Wednesday, December 14, 2011

Stuffing

So I know we just had Thanksgiving and that many of you prefer the easy route of making stuffing from a box but we also have stuffing Christmas day so I thought I would post my recipe for stuffing. Now believe me this stuffing is way better than anything you can get from a box and it is all homemade (well except the veggies). Now you can take a short cut and use already made stuffing cubes or day old french bread from the store and it will be great but if you have time use one of your favorite white bread recipes and make bread a few days before and make it with that. I got many rave reviews and even one comment from a friend that he could never eat any other stuffing again. Now I am not trying to toot my own horn I am just trying to get you to go make this stuffing and get you away from the boxed stuff!!!

Stuffing(makes 1-9x13 and 1-8x8pan)
2 loaves french bread, cut into 1/2 inch cubes(about 15 cups bread cubes)
1 stick butter, plus more for top when baking
1 T. olive oil
8 stalks celery, diced small
2 onions, diced small
1-2 T. minced garlic(I use a lot because if you haven't already noticed we love garlic)
3-4 cups chicken broth(depending on how moist you like it)
1 tsp poultry seasoning
2 T. dried parsley or 6 T fresh parsley chopped
2 tsp dried sage
1 tsp thyme
1 tsp pepper
1 tsp salt

Preheat oven to 350 degrees. Spread bread cubes in a single layer on rimmed baking sheets. Toast in oven until golden about 20 minutes, tossing once during that time. Melt the butter with the oil in a large skillet over medium heat, add the celery, onions, garlic, pinch of salt and cook until veggies are soft. Mix the toasted bread crumbs with the veggies. Stir in the seasonings and chicken broth. Taste to see if it needs more salt. Then place in greased pans. Put pats of butter over the top of each pan. Cover with foil and bakd for 25 minutes , an uncover and bake for 10-15 minutes more or until your desired crispyness is reached. I like mine crispy but a lot of people like their moist so cook it less if you like it moist. Enjoy!!

Note: you can also stuff a turkey with it. Just stuff it inside the turkey right after you mix everything together instead of baking it.

Thursday, December 8, 2011

Cream Cheese Veggie Soup

I have seen this soup on many other cooking blogs and have had it bookmarked to make for awhile and finally did. Now that it is getting cold here. It snowed yesterday(didn't stick)but none the less it cooled it off. There is nothing better than a warm comforting soup on a cold day. This soup was awesome and so easy to make. It came together quickly. Go make this soup you will be thankful you did.

Cream Cheese Veggie Soup
2 T. butter
1 onion, chopped
2-3 stalks, celery chopped
3 carrots, chopped
2 T. minced garlic
1-2 lbs. small red potatoes(I left the skins on. if using other potatoes peel and chop)
4 cups or 32 oz box of chicken stock
1 cup milk(any kind skim 1% 2% or whole milk)
4 T. flour
1 (8 oz) pkg. regular or light cream cheese(i used light)needs to be really soft I just microwave mine for about 20-30 seconds
1 lb. chicken, cooked and shredded or 1 lb smoked sausage( like hillshire farms cut and fried till brown one each side)I used smoked sausage was yummy!!!or can leave meat out and make it vegetarian if you want.
Salt and pepper to taste
1 T. parsley
1 cup frozen corn

In a large pot melt the butter, add the onions, celery, carrots, and garlic and saute until for about 5 minutes till the veggies start to get tender. Add the chicken broth and bring to a boil. Add the potatoes, bring back to a boil, reduce the heat and simmer until the veggies are tender. In a separate bowl, whisk the milk and flour until smooth. While stirring the soup, pour the milk/flour mixture into the soup and cook until soup begins to thicken. Add the salt, pepper,and parsley. Add the very soft cream cheese into pot in little clumps and cook stirring until melted into the soup. Add the chicken or smoked sausage and frozen corn and heat through. Serve warm with rolls or crusty bread.

Tuesday, December 6, 2011

Caramel Truffles

Well the holiday season is in full swing and we all know what that means. Goodies, goodies, and more goodies. If you are needed a new idea for something to add to your holiday fare or candy/cookie plates you give out to friends and neighbors than look no further. These awesome truffles are easy to make and taste delicious. If you love truffles you must give these babies a try and believe me those you give them to will love you for it!!!

Caramel Truffles
26 caramels(store bought or homemade)
1 cup milk chocolate chips
1/4 cup heavy whipping cream
1 1/3 cups more milk chocolate chips(or if you are a dark chocolate fan use that)
1 T. shortening

Line a 8 inch square pan with plastic wrap, set aside. In a microwave safe bowl combine the caramels, 1 cup chocolate chips, and cream. Microwave on high 1 minute, then stir. Continue microwaving , stirring every 15 seconds until melted and smooth. Spread in the prepared pan and refrigerate until firm. Cut into 30 pieces and roll into 1 inch balls. Refrigerate for 1 hour. (or speed the process up by sticking them in the freezer) Melt the remaining chocolate chips and shortening together until smooth. Dip each ball in the chocolate. place on a cookie sheet or plate and refrigerate until firm. Eat and enjoy!!!

Wednesday, November 30, 2011

30 minute Baguette Bread(or a little bit longer)

Wow is about all I can say about this bread. When I saw the recipe and noticed you only had to raise the bread once and for only 30 minutes I was suprised. I have tried breads that don't raise much and they were hard little rocks and I was very disappointed. I decided I had better try this bread out. Let me tell you it was awesome. Not only is it fast but it tasted fantastic as well and don't even get me started on toasting it the next day and slathering it with butter. If you are in need of a quick bread recipe to serve with soup or with pasta and don't have time for a lengthy rising process than give this bread a try. And it is so much cheaper than picking up a loaf at the local super market. Now don't get me wrong I love breads that take hours to make but this is great addition to a fast weeknight meal.And the ingredients everyone should always have on hand in their pantry's.

Baguette Bread(makes 2 loaves)
2 cups very warm water
1 T. yeast
2 T. honey
1 1/2 tsp salt
4 cups flour(may need a little more I always add a little more)

Preheat oven to 425 degrees.In the bowl of your mixer combine the water, yeast, and honey. Give it a quick little stir and let set for 10 minutes or until the yeast is bubbly. Turn the mixer on and add the salt and 2 cups flour. Mix for 2 minutes. Add 2 more cups of flour and mix. Kneed the dough in the mixer for 5 minutes until smooth and elastic. Remove the dough from the mixer and knead by hand a few times, adding a little bit of flour if it is to sticky. The dough should be soft and tacky but not sticky!!! Divide the dough into 4 equal parts. Roll each piece into a 12 inch rope. Twist two of the pieces together, pinching the ends to secure. Repeat with remaining two pieces. Place both twists on a large greased cookie sheet. Cover with towel and let raise for 30 minutes. Place in the oven and bake for 15-20 minutes(mine takes 20 min) Brush each loaf with butter about 2 minutes before done. Finish baking. The butter helps the top crust turn brown.

Note: you can substitute instant yeast for the active dry yeast just add it in with the flour. I have used both kinds and works great with each

Note: I have also used half white whole wheat flour and all purpose flour and it turned out great!! I haven't tried all wheat yet but if you do I recommend using white whole wheat flour.

Monday, November 28, 2011

Sour Cream Waffles

My kids and hubby could eat waffles everyday and well I could too but we usually only have time for them on the weekend unless we wanted to get up at 5 am and that just isn't going to happen we get up early enough as it is to get my kids on the bus by 6:30. I have a wonderful waffle and pancake recipe already well actually I have two one is here but I am always looking for ways to change it up. When I stumbled across this recipe on a friend Emily's food blog(she has some great recipes go and check them out here) I knew I had to give it a try and man were they good. Not the least fattening but oh so good!! And lets face it once you slather those waffles with butter and syrup they aren't that healthy for you anyway. If you want a new way to fix waffles give these babies a try!!

Sour Cream Waffles
3 1/2 cups whole wheat flour(you can use white if you like)
2 T sugar
2 T. baking powder
1 tsp salt
1 stick butter, melted
2 1/2 cups buttermilk
1 cup sour cream
6 large eggs

In a large bowl whisk flour, sugar, baking powder, and salt. In a smaller bowl, mix the butter, buttermilk, sour cream, and eggs. Pour into dry ingredients and stir until mostly smooth, don't overmix. Spray waffle iron with cooking spray(do this for each batch of waffles you put in). Enjoy with butter and your favorite waffle toppings.

Wednesday, November 16, 2011

Blueberry Muffins

My husband loves and I mean loves blueberry muffins. He has to go to work real early each day so I have to have things on hand that he can just grab and go. I went on the search for a good blueberry muffin recipe. Boy was this recipe tasty. It for now will be my go to blueberry muffin recipe. I found this over at Mel's Kitchen Cafe and adapted it a little to our liking. If you love blueberry muffins you will love this muffin recipe believe me!!!

Blueberry Muffins adapted from Mel's kitchen cafe
12 oz bag frozen blueberries or 2 cups fresh blueberries(I used frozen because they were cheaper at the time)
1 1/8 cup sugar
2 1/2 cups flour
2 1/2 teaspoons baking powder
1 tsp salt
2 large eggs
4 T. melted butter
1/4 cup canola oil
1 cup buttermilk
1 1/2 tsp vanilla

Whisk the flour, baking powder, and salt together in a bowl. Toss in the blueberries with the flour mixture. in another bowl whisk the sugar and eggs together until thick, about 45 seconds. Slowly whisk in melted butter and oil until combined. Whisk in the buttermilk and vanilla until combined. With a rubber spatula fold in the egg mixture into the flour mixture just until all ingredients are moistened. Do not over mix-the batter will be lumpy with just a few dry spots. this is the key to moist and tender muffins. Fill greased muffin cups 3/4 of the way full with batter. Then sprinkle each muffin with this mixture:
1/2 cup flour
1 cup sugar
1/4 cup butter
Mix until crumbly with a pastry blender or a knife and fork and sprinkle on top of each muffin-be generous. Bake the muffins at 325 for 20-25 minutes our until a toothpick inserted in middle comes out clean.
*makes 12-16 muffins

Thursday, November 10, 2011

Falafel

We love all kinds of food from all over the world around our house. My husband had to live over in Egypt for a time for school and ate a lot of falafel over there. It is one of there main staples. They eat it inside pita bread as a sandwich. We love these little fried patties ever since he asked me to make them. We have been making them for years. Even if you think you don't like garbanzo beans you must give these babies a try. Paired with homemade pita bread(recipe here), lettuce, tomatoes, feta cheese(or whatever cheese you like for that matter), avocados, and yogurt cucumber sauce make these irresistible!!


Falafel
1 can garbanzo beans(chickpeas)drained and rinsed
1/2 large onion roughly chopped(about 1 cup)
2 T. fresh parsley or you can use 1 T. dried
2 T. fresh cilantro
3/4 tsp salt
1/2-1 tsp. dried hot red pepper(depending on how hot you want it)
4 cloves, or 2 tsp minced garlic
1 tsp cumin
1 tsp baking powder
4-6 T. flour (I ended up using almost 10 T.)

Put onion, parsley, cilantro, hot pepper, salt, garlic, and cumin in a food processor or blender and blend till onion is small. Dump in the beans and process until well blended but not totally pureed. Sprinkle in the baking powder and 4 T. of flour and pulse. YOu want to add enough flour so that the dough forms a small ball and no longer sticks to your hands. Turn into a bowl and refrigerate, covered for several hours. Form the chickpea mixture into little patties about the size of a sausage patty. Heat 3 inches of oil to 375 degrees and fry the patties for a few minutes, or until browned, on each side. Drain on paper towels and serve with pita bread(recipe found Here) and any toppings you would like as I mentioned above.

Tuesday, November 8, 2011

Peanut Butter Chocolate Chip Cookies

Peanut butter and chocolate. Pure heaven. These cookies are awesome!! I have another recipe for peanut butter cookies but this recipe is way better. It will be my go to recipe for now on. You can not eat just one of these babies believe me!! If you love PB and chocolate as much as I do go make yourself a batch of these!! And just try and not eat the whole plate of them!!!

Peanut Butter Chocolate Chip cookies
1 1/2-2 cups flour
3/4 tsp baking soda
1/2 tsp baking powder
1/2 butter, softened
1 cup creamy or chunky peanut butter(my husband has issues with nuts in his cookies or brownies so I used creamy)
1 1/4 cup brown sugar
1 egg, at room temperature
1 T. milk
1 tsp vanilla
1/2-1 cup peanut butter chips
1-1/2 cup chocolate chips(whatever kind you like best)
2 T. granulated sugar, for rolling

Preheat oven to 325 degrees. In a large bowl beat the brown sugar, butter and peanut butter until fluffy. Mix in the egg,vanilla, and milk;mix well. Add the flour, soda, and powder and beat thoroughly. Mix in the chocolate and peanut butter chips.Place the 2 T. sugar on a plate. Drop rounded teaspoonfuls of cookie dough onto plate and roll till all coated with sugar. Place on ungreased cookie sheets and gently press the top of each cookie with you thumb to slightly flatten. Bake for 10-12 minutes. Do not over bake. they may appear underdone but they are not!! Cool on cookie sheets for 4 minutes. Then enjoy!!

Thursday, November 3, 2011

Basil Chicken in Coconut Curry Sauce

As I have said before we love Indian food in our house. This recipe is just awesome. It is not quite as good as regular curry but it is a close second and it is super simple to make. Next Time we will put some potatoes in it, use less chicken and use bigger pieces of onion. We love potatoes and onion chunks in our curry and it will make this meal go further and be cheaper than using so much meat but none the less it was a 5 star meal. If you love curry give this a try. My kids and hubby gobbled this up!!!
Basil Chicken in Coconut Curry Sauce(written with the changes I will make to it next time)
3 boneless skinless chicken breasts, diced
2-3 large potatoes (peeled and boiled till almost done they will continue to cook in the curry)
1 large onion, roughly chopped(I used a red one)
2 T. minced garlic
2-3 T. curry powder, Divided
3-4 tsp salt
1 1/2 tsp pepper
1 tsp chili powder
4 jalapenos, diced(remove the rib and seeds if you want it less spicy but don't worry about it being too spicy I left the ribs and seeds in and my kids still ate it)
2 T. olive oil
3(14 oz) cans coconut milk(may use light if you like)
3 T. cornstarch
2 T. dried basil
1/4 tsp ground ginger

Place diced uncooked chicken in a medium bowl. Stir together 2 T curry powder, 1 tsp salt, 1 1/2 tsp pepper, and chili powder. dump over chicken and mix till chicken is well coated. Cover and chill in fridge for 1-2 hours. Heat the olive oil in a large pot. Add diced chicken, onion, jalapeno, and garlic and cook till meat is cooked and veggies tender. Add in the basil, 1 T. curry powder, the rest of the salt, and ginger, cook stirring for 30 seconds. Meanwhile, Mix the coconut milk and cornstarch till smooth. Pour into the pot over the chicken and veggies and bring to a boil stirring and cooking till thickened and bubbly. Add the potatoes.Turn the heat down and simmer for 30 minutes. Serve over hot basmati rice.

Recipe Source: Adapted from Mel's Kitchen Cafe

Tuesday, November 1, 2011

Macaroon Granola

Oats, toasted coconut, almonds, chocolate. Nothing could be better than that. This granola is awesome. Reminds me of eating a macaroon or toasted coconut covered in chocolate(which we call haystacks). If you love coconut you will love this granola!!

Macaroon Granola
8 cups rolled oats(not quick cooking)
1 cup wheat germ
1 cup ground flaxseed or whole I used about half and half of each
3 cups shredded coconut
2 cups chopped almonds
1 tsp salt
1 T. Coconut extract
1 T. vanilla
1 1/2 cup honey
1/2 cup coconut milk(unsweetened)
1 cup coconut oil(liquid) You can buy this at any grocery store i got mine in Walmart by all the other cooking oils(mine was solid but I just microwaved it till it was liquid)
1/2-3/4 cup brown sugar
3 cup dark chocolate,chopped or chips

combine all the dry ingredient in a large bowl and mix. in a smaller bowl combine all the liquid ingredients and then dump over the oat mixture. Mix well then spread out on a large greased cookie sheet and bake at 300 degrees for about 45 minutes. stirring at least twice throughout the cooking process. Take out and let rest on the pan for 30 minutes than transfer to a large bowl and let cool completely then add the dark chocolate and stir. Store in an airtight container.

Friday, October 28, 2011

Chicago Style Deep Dish Pizza

I know like me there are many pizza lovers out there!!My little family and I went to eat at a pizza place a few months back that makes chicago style deep dish pizzas and they were awesome. So me being the food crazy person that I am started on the hunt for a good homemade recipe for it. I came a cross one that looked good so we tried it out a few weeks back and let me just tell you it was AMAZING!!! My husband and kids loved it!! If you like pizza as much as I do you must give this a try. It takes a little bit of time but is so worth the time. Believe me!!

Chicago Style Deep Dish Pizza
Dough:
3 1/4 cups flour
1/2 cup cornmeal
1 1/2 tsp salt
2 tsp sugar
2 1/4 tsp instant or rapid rise yeast
1 1/4 cups warm water
3 T. butter, melted-plus 4T. softened
1 tsp olive oil-plus 4T

Mix the flour, cornmeal, salt, sugar, and yeast in a bowl of stand mixer fitted with the dough hook on low speed until incorporated. Add water and melted butter and mix on low speed until fully combined(1-2 mins.)scraping the sides and bottom of bowl occasionally. Increase speed to medium and knead until dough is glossy and smooth and pulls away from sides of bowl, 4-5 minutes.(Dough will only pull away from sides of bowl while mixer is on. When mixer is off dough will fall back to sides) Using fingers, coat a large bowl with 1 tsp olive oil, rubbing excess oil from fingers onto blade of rubber spatula. Using oiled spatula, transfer the dough to oiled bowl, turning once to coat dough with oil. Cover tightly and let rise at room temp. until nearly doubled in volume,45-60 minutes. To laminate the dough. Using a rubber spatula turn dough out onto a dry work surface and roll into a 15 inch by 12 inch rectangle. Using offset spatula spread softened butter over the surface of the dough leaving 1/2 inch border along edges. Starting at the short end, roll dough into a tight cylinder. With seam side down flatten cylinder into 18inch by 4 inch rectangle. Cut the rectangle in thirds crosswise. Working with 1 third, fold into thirds like a business letter;pinch seams together to form a ball. Repeat with remaining thirds. Return balls to oiled bowl;cover tightly, and let rise in refrigerator until nearly doubled in volume, 40-50 minutes.
Adjust oven rack to lower position and preheat oven to 425 degrees. Coat 3-9 inch round cake pans with 2 tablespoons olive oil EACH!! Transfer 1 dough ball to a dry work surface and roll into a 13 inch disk about 1/4 inch thick. Transfer dough to pan and lightly press dough into pan, working into corners and 1 inch up the sides of pan. Repeat with remaining dough. To assemble pizza, layer a tiny bit of sauce in bottom of crust(because chicago style has the sauce on top)sprinkle with 2 cups mozzarella cheese. Spread desired toppings over cheese such as sausage, pepperoni, ham, peppers, onion, olives,etc.Spread pizza sauce over top of toppings and sprinkle with Parmesan cheese. Bake until crust is golden brown, 20-30 minutes. Remove pizza from oven and let rest for 10 minutes before slicing. Enjoy!!!

Note: Original recipe says the dough only makes two pizzas but we found that there was too much dough for our first pizza so we made 3 instead and we like that better(having a little bit thinner crust)

Note:do not skip any of the steps and use the butter where it says to use the butter no substitutes or it won't be as good!!

Note: I doubled the dough recipe so that we had plenty of leftovers plus 2 or 3-9 inch cake pans is not a lot of pizza especially with a husband with a big appetite!!

Pizza Sauce:
2 T. butter
1 T. olive oil
1 onion
2 T. garlic, minced
2 28 oz(each) cans crushed tomatoes
1/2 tsp sugar
2 tsp oregano
1 tsp basil
1/2 tsp black pepper
1 tsp salt

Heat the butter and olive oil over medium heat, add the onion and garlic and cook until the onion is translucent. Add all the rest of the ingredients and simmer for 25-30 minutes(the longer it simmers the better the flavor)

Tuesday, October 25, 2011

Cheesy Chicken Chowder

Oh boy this is true comfort food!! Not so healthy for you but oh so good on a chilly fall or winter day!!. Sometimes we all need to indulge and have yummy fattening food for us. We ate this with some nice fresh homemade whole wheat bread. So so so tasty!!!

CHEESY CHICKEN CHOWDER
2(32 oz) boxes chicken broth
3 cups peeled,diced potatoes
2-3 cups diced carrots(i used three)
1 1/2 cup diced celery
1 onion diced
2 T. Minced garlic
1 tsp salt
1/2 tsp pepper
1/2 cup butter
2/3 cup flour
4 cups milk or cream(I used half milk half cream)
4 cups cheddar cheese shredded
3 cups shredded cooked chicken
1 cup frozen corn

In a large pot,bring the chicken broth to a boil. Add the potatoes, carrots, celery, onion,garlic, salt and pepper. Bring back to a boil, lower heat and simmer until the veggies are tender 20-30 minutes.
Meanwhile, melt butter in a medium saucepan. Whisk in the flour, mix well and let it bubble(simmer) for 1 minute, while stirring constantly. Gradually whisk in the milk/cream and cook over low heat until slightly thickened. Stir in the cheese and cook until melted. Add the cheese mixture to the broth and cooked vegggies along with the chicken and frozen corn. Cook and stir occasionally over low heat for another 20 minutes or so. Serve with warm rolls or bread!!

Thursday, October 20, 2011

Cookie Dough Truffles

So these little truffles are heaven!!! Especially if you are one of those people who prefer the cookie dough over the cookie. If you need a little bit of heaven in your life go make these quick!! Just try to not eat the whole batch!!

Cookie Dough Truffles (if you do 1 inch balls makes about 5 dozen)
1/2 cup butter, softened
3/4 cup packed brown sugar
2 1/4 cup flour
1(14 oz)can sweetened condensed milk
1 tsp vanilla extract
1/2 cup mini chocolate chips
1/2 cup chopped walnuts or pecans(optional, I didn't add them)
1 1/2 pounds milk chocolate (I used milk choco chips)

In a mixing bowl, cream the butter and brown sugar until light and fluffy. Add the flour, sweetened condensed milk, and vanilla;mix well. Stir in Chocolate chips and nuts if using. Shape into 1 inch balls;place on cookie sheet. Loosely cover and freeze for 1-2 hours or until firm(the dough softens quickly and works best if frozen)In a microwave safe bowl, melt 1 1/2 pound chocolate;stirring often until smooth. Dip the frozen dough balls in chocolate;placing back on cookie sheet. Refrigerate until firm.Enjoy!!!

What the inside looks like. SOrry it is such a bad picture just take my word for it you've got to try these!!!

Recipe source:Mel's Kitchen Cafe

Friday, October 14, 2011

Chicken Bundles

I have had these wonderful little bundles many times but with store bought crescent rolls and so when I saw these over at Mel's kitchen Cafe with homemade crescent rolls I knew I had to try them out. Oh boy were they good. Takes a little bit more work but they are so much better than store bought. Give these a try you will love them. Just awesome for Sunday dinner!!

CHICKEN BUNDLES

Filling:
3-4 chicken breasts, cooked and shredded
2(8 0z) pkgs of cream cheese, at room temp.
4 T. melted butter
1 tsp garlic powder
1 tsp salt
1/2 tsp black pepper

Mix all together until well combined. Set Aside.

Rolls and Coating:
1 batch buttery crescent rolls(recipe below)
1 stick butter, melted
2 cups panko bread crumbs
1/2 cup grated parmesan cheese

Parmesan Sauce:
3 T. butter
3 T. flour
1 chicken bouillon cube or 1 tsp chicken bouillon granules
1/2 tsp salt
1/4 tsp pepper
1 1/2 cups milk
3/4 cup parmesan cheese
1 cup sour cream, light or regular

Make the buttery crescent rolls according to the recipe but after the first rise deflate the dough and seperate into two pieces. Roll each piece of dough into a 13x20 inch rectangle and cute each rectangle into 12 pieces.(cutting lengthwise in half and then each half into 6 pieces) One by one flatten each dough piece slightly and spoon about 1/4 cup chicken mixture into the center of each. Fold up the edges and pinch them together to seal well.
When all the chicken bundles have been formed, combine the panko crumbs and paremasan cheese in a flat dish. One by one dip each bundle in the melted butter and then the bread crumbs. Place seam side down on a greased cookie sheet.
Bake in a 350 degree oven for 18-20 minutes or until bundles are lightly golden brown and the dough is baked through.
While the rolls are baking,prepare the sauce. In a medium saucepan, melt the butter. Whisk in the flour and cook for 1-2 minutes, stirring constantly, until the mixtures is golden and bubbly. Slowly whisk in the milk, chicken bouillon, salt, and pepper. Stir constantly over medium heat until sauce thickens and bubbles. (about 5-10 minutes) Make sure you don't burn it turn down the heat if needed. Stir in the parmesan chees and cook until the cheese is melted. Remove the sauce from the heat. Add in the sour cream.
Serve the rolls warm from the oven with the Parmesan sauce drizzled over the top.

Buttery Crescent Rolls

Note: if you need/want to use active dry yeast instead of instant yeast, change the amount of yeast to 2 tablespoons active dry and dissolve the yeast in 1/2 cup warm water and 1 tablespoon sugar. Let the yeast mixture activate and foam (approximately 5 minutes) before adding it to the cornmeal mixture with the butter and 1/3 cup sugar.

Also, as with all yeast doughs, I never use the flour amount called for in the recipe as a hard fast rule (unless a weight measure is given and then I pull out my kitchen scale). Because humidity, temperature, altitude and a multitude of other factors can impact how much flour you need in your yeast doughs, I always judge when to quit adding flour by the texture and look and feel of the dough rather than how much flour I’ve added compared to the recipe. This tutorial on yeastmay help identify how a perfectly floured dough should be.

*Makes 2 dozen rolls

2 cups milk
2/3 cup yellow corn meal
1 ½ tablespoons instant yeast
½ cup (1 stick) butter
1/3 cup granulated sugar
1 teaspoon salt
3 large eggs
5 ½ – 6 cups flour

Heat the milk to just below a boil so bubbles are just appearing around the edges (this is called scalding milk). Add the cornmeal and cook and stir until thickened, lowering the temperature if needed so the mixture doesn’t boil (see picture below the recipe for an idea of what the consistency should be). Pour the cornmeal/milk mixture into the bowl of a stand mixer or a large bowl and let cool until lukewarm. Add the yeast, butter and sugar (if you dissolved active dry yeast with a bit of water and sugar until it foamed, add it now). Mix. Add the salt and eggs. Mix well. Add the flour gradually until a soft dough forms. Knead for 5-8 minutes.

Transfer the dough to a lightly greased bowl covered with lightly greased plastic wrap and let rise until doubled.

Divide the dough into three portions and roll each into about an 8-10 inch circle. Brush the top lightly with butter. Cut into 8 wedges and roll each wedge up starting from the wide end so it forms a crescent roll shape. Place each roll on a lightly greased or silpat- or parchment-lined baking sheet, spacing about 1-2 inches apart to allow for rising. Cover lightly with greased plastic wrap. Let the rolls rise until doubled.

Bake at 350 degrees for 10-12 minutes, until lightly browned. Brush with butter while still warm.

Recipe source: www.melskitchencafe.com


Thursday, October 6, 2011

Roasted Red Pepper Hummus

Well in our household we love hummus but I hate buying it in the store because it is expensive. So I decided to make it one day. Man was it awesome and so cheap to make. If you love hummus go make yourself a big ol batch of it now. Don't buy it at the store go make some. If you are not familiar with hummus and wondering what you would eat it with. We dip veggies, crackers, pita chips, pita bread, naan bread, and pretzels in it. We also put it on sandwiches. My kids even gobble this stuff up!! They even ask for me to put some in their lunch with crackers or pretzels. Another great thing about it is that is it super good for you as well.
Roasted Red Pepper Hummus
3 cups cooked garbonzo (chickpeas) beans
1/2 of a 16 oz jar of roasted red peppers(or you can make your own)
2 tsp minced garlic
juice of 2 limes or lemons(I only had limes so that is what I used)
1 1/2 tsp salt
1 tsp cumin
1-2 T. olive oil

Blend all together in a blender or food processor until smooth. Serve with crackers, pretzels, pita chips or bread, veggies,etc. Store in the fridge.

Monday, October 3, 2011

Black Bean Salsa Chicken and Lime Rice

I found this recipe awhile back and finally got around to making it. Boy was it super simple and delish. We ate it over rice the first night but for leftovers we ate it in a tortilla with the rice and it was just as good. This is super simple also you just throw every thing in the crockpot and forget about it. The rice I made turned out awesome as well and was nice to have a change from regular old spanish rice.

Black Bean Salsa Chicken
4 chicken breasts
2/3 cup chicken broth
1/2 cup salsa
1/2 cup green salsa
2 cups frozen corn(or you can use 1 can drained corn but I don't like canned)
1 package taco seasoning
2 tsp corriander
1 T. chili powder
2 cans black beans, drained
1/2 cup sour cream(you can use light)
1 cup sharp cheddar cheese

Place chicken in the crockpot. In a bowl mix all the remaining ingredients except the sour cream and cheese and dump over the chicken. Cover and cook on low for 6-8 hours or high for 3-4 hours. Remove the chicken and shred then return to the sauce. Stir in the sour cream and cheese. Serve over lime rice or in flour or corn tortillas.

Lime Rice
3 cups long grain rice
6 cups chicken broth ( you can do half chicken broth half water)
3/4 tsp salt
1 tsp garlic powder
juice of 2-3 limes
3 T. butter
3 T. olive oil
3/4 tsp cumin
2/3 cup cilantro

Melt the butter in a pot, add the olive oil and all the seasonings and cilantro. Add the rice and cook over medium heat for about 4 minutes stirring constantly. Add the chicken stock or water and lime juice and bring to a boil. Reduce the heat to low and cover and simmer for 30 minutes.
Serve with any mexican food!!!

Wednesday, September 28, 2011

Luscious Lemon Bars

The other night my hubby and I felt like having Lemon Bars so I rummage through my recipes and decided on the recipe in my Better Homes and Garden cookbook. I have made quite a few lemon bars recipes over the years but have never found the One until now. This will be my go to recipe for now on. They were perfect-gooey and lemony just how we like them around here and the crust was awesome!! IT is a bit thicker of a crust than other recipes and I was worried about that but it turned out great and my hubby and I both really enjoyed them!! So did the kids but lets just say my hubby and I ate half the pan in one sitting!!! If you are craving something lemony give these babies a try!!!
Luscious Lemon Bars

2 cups flour (i actually used white whole wheat)
1/2 powdered sugar
2 T Cornstarch
1/4 tsp salt
3/4 cup butter(no substitutions)
4 large eggs slightly beaten
1 1/2 cup sugar
3 T. flour
3/4 -1 cup lemon or lime juice (I used the juice of 3 large limes and the rest bottled lemon juice)
1/4 cup half n half, cream, or milk(don't leave out adds to the creaminess
Powdered sugar for dusting

In a large bowl, mix the flour, powdered sugar, cornstarch, and salt together. Cut in the softened butter with pastry blender or knife or until resembles coarse crumbs. Press into a 9x13 greased pan and bake at 350 for 15-18 minutes or until the edges turn golden.

Meanwhile for the filling, beat the eggs then add the sugar, 3 T. flour, lemon juice, and cream. Mix well and pour over the hot crust. Bake for 15-20 minutes or until center is set. Cool and then sift Powdered sugar over the top. Cut into bars. Cover and store in refrigerator.

Note: I baked mine for 20 minutes and they were still gooey just how a lemon bar should be but if you like them more firm then cook a tad bit longer!!!

Note: the recipe calls for 3/4 cup lemon juice but I added almost a full cup and it was perfect for us.


Monday, September 12, 2011

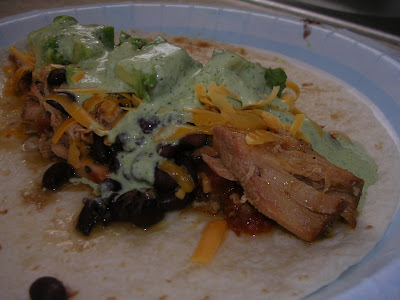
Chili Verde

Wow!! I made this awhile back and it was so yummy. It goes great in a tortilla with beans or is great put on a tostada or in a quesadilla. What is not to love when you can cook it in the crockpot. Makes things so much easier. You must give this a try if you love mexican food.

Chili Verde(from Mel's Kitchen Cafe)
*Serves 8-10

2 tablespoons canola oil
5 pounds boneless pork roast, trimmed of as much fat as possible
Salt and pepper for seasoning roast
2 yellow onions, chopped
5 cloves garlic, finely minced or crushed
1 (15 oz.) can green enchilada sauce
2 (4 oz.) cans diced green chiles
2 (14 oz.) cans diced tomatoes with green chiles
1 beef bouillon cube (or 1 teaspoon beef bouillon granules)
1 teaspoon ground cumin
1 teaspoon dried oregano
½ teaspoon black pepper

Cut the roast into 3-4 large chunks. Season the pork generously with salt and pepper on all sides. In a large heavy pot, the oil over medium heat until the oil is shimmering and hot. Add the pork, being careful not to crowd the pot (brown the pork in shifts, if needed). Brown the pork on all sides until golden and well-browned, about 30 seconds to a minute on each side. Leave the roast in the pot and add the onion and garlic. Cook for 1-2 minutes, stirring often. Place the pork and garlic and onions in the slow cooker (read below for oven-roasting method). Stir in the rest of the ingredients to the slow cooker. Cover and cook on low for 8-9 hours. After the roast has cooked for the allotted time, remove the roast. Shred it into bite-size pieces and set aside, covered with foil to keep warm. Pour the remaining liquid and ingredients from the slow cooker into a large saucepan. Bring the mixture to a boil on the stove, and simmer vigoriously over medium-low or medium heat for 20-30 minutes, stirring often to prevent sticking or burning, until the mixture considerably reduced and thickened. Add the pork roast and sauce back to the slow cooker. Stir to coat the pork with the sauce. Turn the crockpot to low or high and allow the pork to heat through again. Serve with warm tortillas and desired toppings, such as sour cream, cheese, avocados, lettuce, tomatoes.

Oven-roasting Instructions: When beginning the recipe, make sure to use an oven-safe pot for the browning (such as a large enameled cast-iron pot). Follow the recipe up until the point of adding the pork to the slow cooker. Instead, keep the pork in the oven-safe pot. Add in all the other recipe ingredients plus 1/2 cup water. Stir to combine. Cover the pot and cook in the oven at 300 degrees for 3-4 hours. When finished cooking, remove the roast as directed in the above instructions. Follow the recipe to reduce the sauce.

Note: do not skip the step of reducing the sauce it is essential to the flavor of the pork

Note: freezes wonderfully. Freeze in ziploc bags. Take out the night before and thaw in fridge overnight and reheat on stovetop in saucepan.

Wednesday, August 31, 2011

Nutella Banana Bread

Do you ever wonder how you can change up plain old banana bread? We love banana bread around here but it is sure nice to change it up every once in a while. So when I saw this recipe over at Sugar Plum I knew it had to be delish. If you need a change give this bread a try. It really is a wonderful combination.


Nutella Banana Bread adapted from Sugar plum
5 3/4 cup flour
2 1/2 tsp baking powder
2 1/2 tsp baking soda
1/2 c buttermilk
4 c. bananas, mashed
1 c. butter, softened
1 1/4 c. brown sugar
1 1/4 c. sugar
1 T vanilla
5 eggs
1 tsp salt
1 1/4 cup nutella

Preheat oven to 350 degrees. Coat 3 large loaf pans or 7-8 mini ones with cooking spray.
In a large bowl, mix together the butter and sugars. Then add the mashed bananas, eggs, vanilla and buttermilk and mix well. Stir in the flour, powder, soda, and salt and mix just till combined. Divide the batter in half, pouring on half into another bowl. Stir the nutella into one half of the batter until combined. Alternate spoonfuls of batter into loaf pans until all the batter is used up. Swirl the batter gently with a knife(not too much!!) Bake for 1 hour or until a toothpick inserted in the middle comes out with a few moist crumbs on it.

Note: it makes quite a bit of bread. if you don't want that much just cut the recipe in half or take some to a neighbor. It also freezes well so you can make it all and just freeze what you won't eat and take it out when you need it!! (that is what I do)

Monday, August 22, 2011

Whole Wheat Naan with Chicken and Chick Peas

Love love love Naan. I have been searching for a good whole wheat naan recipe and I finally found one. It was so yummy and tasted just as good as regular. Now when I can find something and make it a little bit healthier for us that tastes just as good it makes me happy. Give this recipe a try it is awesome. Eat it with curry, falafel, meat and veggie kabobs or fill it with chicken and chick peas like we did.

Whole Wheat Naan
1/2 cup warm water
2 tsp active dry yeast
1 tsp sugar
2 cups whole wheat flour(I used fresh ground white whole wheat)
1/2 cup bread flour( I didn't have so used all purpose)
1/2 tsp salt
1/4 cup olive oil
1/4 cup plain yogurt
1 large egg
Olive oil,for cooking

In a large bowl stir together the water, yeast, and sugar and let stand for 10 minutes.Stir in the yogurt, oil, and egg until mixed. and then stir in the flour and salt. Knead until you have a soft, pliable dough. Cover and let rise until doubled in size...about an hour. Punch dough down and divide into 8 -10 pieces. Roll out each piece ,on a lightly floured surface , into a thin circle. Heat a skillet, wiped with a tiny bit of olive oil, over medium heat and fry each side until brown dots appear.

Crockpot Chicken and Chickpeas
4 chicken breasts
1 can chickpeas, drained and rinsed
1/4 cup olive oil
juice of 2-3 lemons
1/4-1/3 cup fresh oregano or 1 T. dried oregano
1 small onion, diced
1/2 green pepper, diced
2 T. minced garlic
1 tsp salt
1 tsp pepper
1/2 - 1 cup water
1 tsp. chicken bouillon

Place all in a crockpot and cook on high for 4-5 hours or low 7-8 hours. Serve in WW Naan bread with tomatoes, avocados, fresh spinach, and feta cheese. Or you can serve with rice!!!

Note: for my kiddos I took the onion and pepper out of the meat. I just wanted to use them for the flavor. My kids will eat onions and peppers just not in big chunks!!

Friday, August 12, 2011

Chocolate Chip Cookie Dough Cheesecake

CHEESCAKE!!! Is as I have said before my most favorite treat ever. For my birthday we always have cheesecake instead of cake. This by far is the best cheesecake I have ever made!!(even better than the pumpkin one) I have had this recipe marked to make for a long time but I was waiting for a special occasion to use it for. It was one of my dear friends birthday a couple weeks back and her husband was gone for it so I invited her and her kids for dinner and dessert. She requested cheesecake and I decided now was the time to try this recipe. I mean this said dear friend was in the delivery room with me while I had my baby 9 months ago because my husband was gone at the time. She listened to me yell out in pain(because said baby came way too fast for an epidural or any pain medication for that matter)So I decided this was the least I could do to make up for that. It was a hit to say the least!! Her oldest son(11) said it was the best cheesecake he has ever had!! Now that is a compliment!! So if you want some compliments get in the kitchen right now and make this for your loved ones!! Oh and so I don't forget I got this recipe over at Mel's Kitchen Cafe..Just like so many of my other recipes!!!
Chocolate Chip Cookie Dough Cheesecake adapted from Mel's Kitchen Cafe
Crust:
4 T. butter, melted
2 1/2 cups graham cracker crumbs(or you can use chocolate cookie crumbs) I prefer the grahams cracker
1/4 cup sugar

Filling:
5 (8 oz each) packages cream cheese, at room temperature
1 cup sugar
5 large eggs
1 tsp flour
1 teaspoon vanilla
1 cup sour cream(you may use light but not light cream cheese)

Cookie Dough:
1/2 cup butter, softened
1/2 cup sugar
1/2 cup brown sugar
2 T. milk
1 tsp. vanilla
1- 1 1/2 cup flour(I had to use 1 1/2cups)
1 cup mini chocolate chips
an additional 1 cup mini chocolate chips to fold into batter with cookie dough balls

For the cookie dough: Cream the butter and the sugars until creamy and fluffy. Add the milk
and vanilla and blend. Mix in the flour and the chocolate chips. The dough will be fairly soft but you don't want it too soft so add a little more flour if you need to. Roll the dough into small balls(about teaspoon sized) and place them on a wax lined plate or cookie sheet and freeze while you are making the rest of the cheesecake.

For the crust: Lightly grease the bottom of a 10 inch springform pan. Combine the butter sugar and crumbs and mix well. Press into the bottom and up the sides of the springform pan.

For the cheesecake: With you mixer or hand mixer beat the cream cheese and sugar, on high speed, until smooth. Add the eggs and flour and mix till smooth. Add the vanilla and sour cream and mix just until blended. Be careful not to overmix because that causes the cheesecake to crack when baking. Pour half the batter into the prepared crust. Gently stir in the cookie dough balls and chocolate chips into the remaining batter and dump into the pan and spread out evenly. Bake the cheesecake at 325 degrees for one hour. Turn off the oven and leave the cake in for 30 more minutes, without disturbing it. or opening the door. Remove from oven and let cool completely and then let sit in fridge overnight before serving. Serve with REAL whipped cream and store leftovers in the fridge.

as you can see mine cracked a little but nothing a little dollop of real whipped cream can't hide!!!

Tuesday, August 9, 2011

Mediterranean Pasta Salad

We had a church bbq a few weeks ago and I need to bring a salad to. I was sick of always bringing the same old pasta salad and didn't want to bring potato salad or salad with mayo in it because it was super hot out so I went in search for a yummy looking new take on the pasta salad. I found this recipe over at Mel's Kitchen Cafe and since she never disappoints(as in I have never used one of her recipes that I didn't like/love) I decided to give this one a whirl. Can I just say that this is my new go to pasta salad. It is amazing!!!

Mediterranean Pasta Salad
1 lb tri color pasta(I used rotini but use whatever you like)
1/4 cup balsamic vinegar
2 tsp. dijon mustard(I only had spicy brown so that is what I used)
1/2 tsp salt
1/2 tsp pepper
1/2 cup olive oil
1/3 cup diced sun-dried tomatoes(I like Mel like the sun-dried tomatoes in a jar packed in oil)
1 can drained and diced artichoke hearts(I didn't use these because I didn't have any on hand)
1/4 cup fresh basil torn into small pieces or 1 T. dried
2 tsp fresh oregano chopped or 1/2 tsp dried
1/4 cup red onion
3/4 cup black or kalamata olives, sliced
2 tsp saute spice(equal parts pepper, salt and garlic powder make some up and keep in with all your other spices)
4 oz feta cheese, crumbled
1/2 cup parmesan cheese

Whisk together the vinegar, mustard, salt, and pepper in a small bowl. Gradually whisk in the olive oil to make a smooth dressing. Set aside.
Bring a large pot of water to bowl . Add the pasta and cook until al dente;drain then pour pasta into a large bowl. While the pasta is still warm pour in a couple of Tablespoons. of the dressing and toss with pasta so that the pasta doesn't stick together as it cools. Let it cool to room temp. When that pasta is cooled, add the sun-dried tomatoes, artichokes of using, basil, oregano, onion, olives, saute spice, and oregano and toss. Add the rest of the dressing and toss again until ingredients are evenly coated with dressing. Add the cheeses and lightly toss.Serve at room temp or chilled.

Note: Instead of the artichokes I used some cut up little tomatoes because I had some that needed to be used. Just use what suites your fancy.


Friday, August 5, 2011

Mango Quinoa Salad

Oh boy this Salad was so yummy and is so very good for you!! If you need a new salad to take to a bbq or a light side dish to go along with grilled meat then this recipe is for you!!! For those of you who haven't jumped on the quinoa band wagon I suggest you do. It is super yummy and so good for you. We use it in place of rice sometimes. My family really loves it!! Now some of you may shy away for using a sweet mango in a savory salad but believe me do not leave it out. It is amazing paired with all of the other ingredients. I first saw this recipe over at the Recipe Shoebox and the other day at Mel's kitchen Cafe. Check them out they have some awesome recipes.!!!

Mango Quinoa Salad
2 cups cooked quinoa, room temperature or chilled
1 can black beans, drained and rinsed
1 mango, peeled and diced
1 red bell pepper
6 green onions, thinly sliced or red onion diced(I only had a red onion so that is what I used)
1/2 cup chopped fresh cilantro(I didn't have any on hand but will definitely use next time)
2 T. red wine vinegar
3 T. olive oil
2 T. lime juice
1 T. sugar
salt and pepper to taste

Place quinoa in a large bowl. Add the mango, red pepper, green or red onions, black beans, and cilantro. Set aside. In a small bowl, whisk together the vinegar, oil, lime juice, and sugar till smooth. Pour over the salad. Toss to combine and add salt and pepper to taste. For a main dish serve at room temp. with hot grilled chicken or shrimp. For a side dish serve chilled.

Monday, August 1, 2011

French Bread

So who would have ever thought that French Bread could be so easy to make and also that it is way cheaper than buying a loaf at the store. So I know a lot of us don't have time for the bread to raise and such especially those of you that work during the week but believe me you need to try this out. You will have a hard time ever buying store bought again. This recipe makes two big loaves so you can always freeze one and use it on a day when you don't have time to make it.

French Bread
2 1/2 cups warm water
2 T. yeast
3 T. sugar
2 T. white vinegar
Mix these ingredients and let them sit until bubbly and the yeast is activated:
then add:
1 T. salt
1/3 cup oil(i used olive oil)
6 cups flour(a little less or more depending on the feel of the dough you want a soft dough but not sticky)
Knead the dough for 2-5 Minutes. Then place in the same bowl you mixed it up in, cover it and let it raise to the top of the bowl then punch it down, cover and repeat this process 2-5 times. The more times you let it raise and punch it down the better the bread will turn out. No need to do it more than 5 times though. Next put the dough on a greased countertop and divide in half. Roll each half into a loaf and place on greased and sprinkled with cornmeal cookie sheet. Slash the tops of the bread diagonally 3-5 times and cover and let raise for 30 minutes or until doubled in size. Preheat oven to 375. Place bread in the oven on top rack placed in the middle of the oven and place a shallow dish with water in it on the rack below the bread(this helps the bread get that crisp crust) Bake for 30 minutes, 10 minutes before the bake time is up brush the bread with ice water(this also helps get that really crispy crust) Enjoy one loaf warm right out of the oven and freeze the other one for later use!!!

Knead

Wednesday, July 27, 2011

Peanut Butter Granola Balls

Please don't judge these little balls or clumps by this picture. It was hard to get a good shot of them. I saw the recipe for these little babies over at Two Peas and their Pod and knew I needed to try them out. These did not disappoint. They came together in a snap and where quite tasty with no added sugar and very little butter. If you want a quick little snack or treat but don't have a lot of time and want something a little bit healthier give these babies a try.


Peanut Butter Granola Balls adapted from Two Peas& their Pod
2/3 cup honey
1/2 cup natural or homemade peanut butter recipe found here
4 T. butter
2 cups rice cereal(rice krispies)
2 cups old fashioned oats(not quick cooking)
1/2-3/4 cup dried cranberries
1/2-1 cup dark chocolate chips or chunks
1/2 cup mini M&M's(optional)

In a medium saucepan over medium heat, combine the butter, peanut butter, and honey. Stir until melted and smooth about 1-2 minutes. Remove from heat and stir in cereal, oats, cranberries, and chocolate chips. Let the mixture cool for 2 minutes and then stir in the M&M's. Drop mixture by tablespoons into mini paper cupcake or candy liners and refrigerate until set, about 15 minutes. I stored mine in the fridge.

Note: if you want chunks of chocolate instead of it melted than let the mixture cool and stir in chocolate chips later but I liked stirring in the chocolate right away and letting the chocolate coat the mixture and get melted.
Note:makes about 32 balls or clumps. I was too lazy to make mine look a lot like balls or to roll them for that matter so I just left them as clumps and they still tasted great!!!


Tuesday, July 19, 2011

Jambalaya

I love jambalaya and I always have. I have been searching for a homemade recipe for awhile now. I spotted this recipe at Mel's kitchen Cafe a little while back and printed it off. I finally got around to making it tonight for dinner. Man was it good. My kids gobbled it up as well. While I was cooking my little 5 year old said Man mom it sure smells yummy in here. If you love Jambalaya you must give this recipe a try. It is supper easy and comes together pretty quick.

Jambalaya adapted from Mel's Kitchen Cafe
1 pound smoked sausage, cut into pieces
1 pound chicken, cut into pieces or small shrimp(i used shrimp)
2 T. flour
2 T. butter
1 large onion, chopped
1-2 T. garlic, minced
3 ribs celery, I didn't have any on hand so I didn't use
1 bell pepper (red or green) chopped I used about 7 or 8 mini sweet peppers
1 tsp dried basil
1/4 tsp creole or cajun seasoning(us a light hand if you don't want it overly spicy)
1(10 oz) can Rotel tomatoes
1 (8 oz) can tomato sauce
1/2 tsp sugar
1-2 tsp liquid smoke
1(14.5 oz) can chicken broth(can use low sodium or whatever suits your fancy)
2 cups cooked rice

In a 4-6 quart pot, cook the sausage and chicken or shrimp over medium heat. If you don't use the sausage then you will need to use a little olive oil to cook the chicken and shrimp in. Cook until done then scrape meat onto a plate and set aside. Melt the butter in the same pot stir in the flour and cook, stirring, for one minute. Add the veggies, basil, Cajun seasoning, Rotel tomatoes, tomato sauce, and sugar. Stir well. Simmer the mixture over low heat for 15-20 minutes, or until veggies are tender. Add the meat back into the pot and cook for 10 minutes more, stirring occasionally. Add the chicken broth and simmer for 5 minutes longer. Then stir in the hot cooked rice until you achieve the desired consistency. (i used more than 2 cups rice)

Note: you can use all one kind of meat if you desire. Use whatever you like the best.

Note: if you want it spicier than add more Cajun or Creole seasoning(i would have added more if my kids weren't eating with us but for them the amount was good that I did) YOu can also by hot rotel or mild so that can change the heat also.


Friday, July 15, 2011

Key Lime Bars

Oh boy where do I begin with these. These are lets just say amazing especially if you want a cool dessert for the summer. These babies are way better than any key lime pie I have every had. If you love Key Lime Pie you must give these babies a try. I have seen the recipe for these on many of the recipe sites that I enjoy looking at so I can't take the credit but I did change them up a little bit because I don't like using only a 2 oz of cream cheese and then I have leftover cream cheese but usually not enough for another recipe so I added the whole 8 oz in and loved it.

Key Lime Bars

Crust:
5 cups animal crackers
6 T. packed brown sugar
1 stick butter, melted

Filling:
1 (8 oz) pkg. cream cheese, softened
1 T. grated lime zest
2 (14 oz) cans sweetened condensed milk
2 large egg yolks
1 1/2 cup fresh lime juice(about 6-8 regular limes or 40 key limes)

Garnish:
3/4 cup toasted coconut
or more crumb crust
or Whipped cream

Preheat the oven to 350 degrees. Spray a 9x13 inch pan with cooking spray. Set aside.

For the crust process the animal crackers and sugar in a blender or food processor until really fine. Place in a bowl and mix with the melted butter and mix till well combined. Press in to the pan and bake until fragrant and golden, about 15-18 min.

For the filling, mix the cream cheese and lime zest together. Whisk in the sweetened condensed milk untill smooth. Whisk in the egg yolks and lime juice until combined. Pour the filling evenly over the baked crust. Bake the bars until the filling is set and the edges are just slightly pulling away from the edges of pan, 15-17 minutes. I baked mine for 16 exactly and they were perfect.

Let the bars cool completely in the pan, about 2 hours. Then cover pan and refrigerate until chilled, about 2 hours. Garnish as desired.

Note: I have made these twice in the past couple of weeks and one of the times I was pressed for time and didn't have time to zest the limes so I didn't add it in and I prefered them without the zest but do whatever suits your fancy

Note: Store leftovers (if there are any) in the fridge!!

Tuesday, July 12, 2011

Whole Wheat Dinner Muffins

I spotted these muffins over at Mel's Kitchen Cafe and I knew I had to give them a try especially since they said they were fast and had whole wheat in them. Cause lets face it sometimes we want bread with dinner but just don't have the time to make yeast rolls or bread for dinner. These were really yummy and such a great recipe when you are short on time. They go great with soup but would be good with anything you like a piece of bread with-pasta, roast, etc. Who doesn't want to try and get more whole grains into their diet.

Whole Wheat Dinner Muffins
2 1/2 cups whole wheat flour
4 T. cornmeal
6 T. firmly packed brown sugar
4 tsp baking powder
1 tsp baking soda
1 tsp salt
4 eggs, separated
6 T. melted butter or olive oil(I used olive oil)
2 cups buttermilk
4 T. sour cream or plain yogurt(I used plain yogurt)

Preheat your oven to 350 degrees. Grease muffin tins. In a large bowl stir together the flour, cornmeal, sugar, baking powder, baking soda, and salt. In another bowl whisk together the egg yolks, butter(oil), buttermilk, and sour cream(yogurt)until blended. Stir the buttermilk mixture into the flour mixture and mix just till moistened. Don't overmix. Batter will be slightly lumpy. In another bowl using a mixer beat the egg whites just until they form soft peaks. Using a large rubber spatula, gently fold in the egg whites until blended, again don't overmix. Spoon the batter in the prepared muffin tins, filling each cup nearly level with the rim of the cup. Bake the muffins until they are golden, dry and springy to the touch and toothpick inserted in the middle comes out clean. about 18-20 minutes. Let cool 5 minutes then take out of tin and serve warm.

Wednesday, July 6, 2011

Root Beer Float on a Stick

I saw this recipe over at Recipe Shoebox and just knew I had to make them. I made them for a get together for the fourth and man were they a hit!!! These were so yummy and so easy and they truly taste like a root beer float. My kids loved them so much I made another batch for them today!!! We have to survive the hot and humid weather somehow. Thanks Lara for such a great recipe!!!

Root Beer Float on a Stick adapted slightly from Recipe Shoebox

Cream layer:
1 cup heavy cream(lara used whole milk i had cream or 1% milk so I opted for the cream)
3 T. Sweetened condensed milk
1 tsp vanilla

Mix together and pour 2 T. into the bottom of 13 (3 oz) dixie cups. Put in freezer for 1 hour. Take out and place sticks in them.

Mix the root Beer layer ingredients together:
3 cups root beer
1 cup sweetened condensed milk

Then pour evenly over each cream layer in the 13 dixie cups(or popsicle molds)Put back in the freezer for 3 hrs or until solid.
This made 13-3 oz size dixie cups.

Sunday, July 3, 2011

Tortellini Spinach Bake

I saw this recipe over at Our Best Bites a little while ago and just new I had to try it. It was so good and I think it was even better the next day. I changed the recipe up just a bit because I wanted to and because I can. It you want to see the original recipe go check it out at www.ourbestbites.com They have some really amazing recipes!! If you love pasta like I do give this one a try!!!

Tortellini Spinach Bake adapted from Our Best Bites
1(12 oz) bag Barrilla Cheese& Spinach Tortellini(in the dry pasta isle at walmart)
1/2 a 1 lb box of whole wheat Rotini(or you can use two tortellini bags)
2 T. olive oil
2 T. garlic
3 T. flour
2 cups milk
1 tsp salt
1/2 tsp pepper
1/2 cup pesto
1/2 tsp basil
1/4-1/2 tsp red pepper flakes(depending on how spicy you like things)
1 medium lemon
2 c. loosely packed fresh spinach, chopped
3/4 cup mozzarella cheese
3/4 cup parm cheese

Preheat the oven to 350 degrees. Fill a large stock pot with water and bring to a boil. Add tortellini and rotini and cook according to package directions. In skillet heat the olive oil, add the garlic and cook till fragrant and tender, about 1 min. Add the flour to the pan and whisk for about 1 minute. Slowly add milk and continue to stir with whisk until smooth. Add salt, pepper, basil, and red pepper flakes and bring sauce to a simmer. Add the juice of the lemon and the pesto and continue to stir and cook until thickened, about 2-3 minutes. Remove from heat. Drain the pasta and mix the drained pasta with the sauce. Add the chopped spinach and 1/2 cup each of the cheeses. Pour into a 8x11 or 9x13 inch dish and top with remaining 1/4 cup each of the cheeses. Cover the pan with foil and bake for 20 minutes. Remove foil and bake for an additional 5-10 minutes, or until the cheese on top is melted and pasta is bubbly throughout. Remove from oven and cool for 10 minutes before serving.

*you can add chicken or bacon to this if you desire but I think it is tasty as is!!

Wednesday, June 29, 2011

Grilled Balsamic Chicken

Well, I actually made this delicious chicken a year ago and I cannot believe that I forgot to post this one. This is amazing- as in one of the best recipes for chicken that I have ever had. My husband whole heartedly agreed with me as well. If you are sick of always having hamburgers, hot dogs and regular grilled chicken with bbq sauce then step out on a limb and give this yummy healthy chicken a try you will not be disappointed. We served this with broiled(not boiled) zucchini and a baked potato.

Grilled Balsamic Chicken(for 6-8 chicken breasts)
2/3 cup balsamic vinegar
1/4 cup dijon or spicy brown mustard(i have used both whichever you prefer use)
1/4 cup olive oil
1 T. parsley
2 T. minced shallots or onion(don't go out and buy shallots if you don't have them just use onion I did)
1 tsp dried Thyme
1/2 tsp pepper
1 tsp garlic powder or you could use fresh minced garlic as well
2 tsp Kosher salt or seasoning salt(I use Kosher salt)

Mix marinade ingredients together in a ziploc bag. Add the chicken breast and coat well with marinade. Let marinade in fridge for 4-6 hours. I make mine the morning we are going to grill so it marinades all day. Grill on your grill until cooked through.

Thursday, June 23, 2011

Peanut Butter Banana Nutella Stuffed French Toast

About a month ago my kids wanted french toast for breakfast and so I decided to make stuffed french toast. This french toast was amazing and my kids gobbled this up. Now this is more of a method than it is a recipe. Get creative if you don't like pb and nutella and use whatever fruit and spread suits your fancy. We have also made this with strawberries and cream cheese instead.

PB, Banana, and Nutella Stuffed French Toast
8 slice of homemade whole wheat bread(or store bought)
2 bananas sliced
Peanut butter
Nutella
Syrup
3 eggs
3/4 -1 cup milk
2 tsp cinnamon
1 tsp vanilla or rum extract( I have used both)

In a bowl, beat the eggs then whisk in the milk, cinnamon, and extract. Set Aside.

Take two slices of bread and spread peanut butter and nutella on one piece. Take some slices of banana and put them on top of the pb and nutella and place the other piece of bread on top like a sandwich. Place sandwich in the bowl with the eggs and milk and coat each side and then place on hot grill or in hot skillet and cook until browned on each side. Place on a plate and serve with syrup and garnish with extra bananas. Repeat with each remaining sandwich.

If doing cream cheese and strawberries spread bread with cream cheese and top with strawberry slices and put a top on and dip in egg mixture and cook on grill till done.

Monday, June 20, 2011

Ooey-Gooey Peanut Butter Chocolate Brownies

Chocolate and Peanut butter nothing goes better together than these two things other than maybe caramel. I found this yummy easy recipe over at Our Best Bites. These were a cinch to make and came together fast. If you are a chocolate and peanut butter kind of person print this recipe off now or if you need to take a dessert to a BBQ take these babies!!!

Peanut Butter Chocolate Brownies adapted from Our Best Bites
1(14 oz)can sweetened condensed milk, divided
1/2 cup butter, melted and cooled(1 stick)
1/4 cup milk
1 box devil's food cake mix
1 large egg
1 (7 oz) jar marshmallow creme
1 cup peanut butter chips
1/3 cup creamy peanut butter

Combine about 1/3 of the can of sweetened condensed milk, butter,milk, cake mix, and egg. Mixture will be very thick. Spray9x13 inch pan with cooking spray. Press 2/3 of mixture into prepared pan. Use floured hands or spray your hand with cooking spray to do so. The layer will be thin don't worry. Bake for 10 minutes.

Meanwhile, combine the rest of the sweetened condensed milk, marshmallow creme,and peanut butter and combine until smooth. Stir in the pb chips. SPread this layer over the cooked brownie layer. Carefully drop remaining batter by spoonfuls over the marshmallow mixture. Bake at 350 for about 30 minutes. Remove from oven and cool before cutting into squares.

Thursday, June 16, 2011

Skillet BBQ Chicken Pasta

I am always looking for new was to use pasta or should I say eat pasta and when I saw this over at Mel's Kitchen Cafe. I knew I had to give it a whirl. This pasta did not disappoint!! It was very yummy and so nice to be able to cook it all in one pan. So much easier to clean up that way. This recipe is also very kid friendly so give it a whirl if you are looking for a new way to have pasta!!!

Skillet BBQ Pasta adapted from My Kitchen Cafe
1 T olive oil
2 chicken breasts cut into bite-size chunks
1 red onion, diced (I didn't have one on hand so I used a regular yellow onion)
3 cups water
2 1/2 cups chicken broth(I used one 14 oz can and used more water for the rest)
1/2 tsp salt
12-13 oz penne pasta
2/3 cup bbq sauce(recipe for homemade found here.)
1/3 cup sour cream(use nonfat or lowfat if desired)
1/2 cup mozzarella cheese
1/2 cup sharp cheddar Cheese

In a large skillet or pot, heat the olive oil over medium heat. When hot add the chicken and cook until no longer pink. Add the onions and cook till tender. Remove the chicken and onions to a plate. In the same skillet add the water, brother, pasta, and salt. Bring to a boil and simmer for 12-15 minutes, until the liquid is almost absorbed, the pasta is tender and the mixture is thick and syrupy. Stir in the bbq sauce,and sour cream. Once mixed, add in the chicken onions, and shredded cheeses. Stir to combine and cook until everything is heated through.