Hi to all who follow my blog. I have created my own domain and more user friendly food blog. I am still in the process of categorizing all my posts from this blog to my new site but it is getting there and that is where I will be posting all of my new recipes. This blog will remain here but no more new recipes will show up here. So please come to my new site and check it out and to continue to view the new recipes I try and my family loves. Thanks so much for reading my blog. I really love sharing my recipe finds with you all.
My new site is www.foodbringsfamiliestogether.com
so come on over and check it out!!!
Tuesday, September 30, 2014

Friday, June 27, 2014
Rice Pilaf w/ Chickpeas and Lentils
Back years and years ago my husband found this recipe on the internet somewhere. He wanted a rice we could eat with chicken kabobs that was different than many of the others out there. We fell in love with this rice. So tasty and good for you as well. Super easy and fast to make. Perfect side to any meal.

Rice Pilaf w/ Chickpeas and Lentils
1/2 cup cooked lentils
1/2 cup cooked chickpeas
4 T. olive oil
1 medium onion, chopped
1 tsp sugar
salt and pepper to taste
1 T. fresh lemon juice
1/2 cup long grain rice, uncooked
1/4 cup orzo(found in the pasta section of grocery store)
2 medium tomatoes, chopped
1 T. cumin
1 tsp ground cayenne or red pepper (use only 1/2 tsp if don't like it spicy)
2 cups chicken broth or water
1/4 cup chopped fresh parsley or 1 T. dried parsley
Heat oil in a large skillet. Add the onions, sugar, salt, and pepper. Cover and cook on medium heat for 5 minutes. Uncover and turn heat up to high stir in lemon juice, rice, orzo and cook for 2-4 minutes, while stirring. Add the tomatoes, lentils, chickpeas, cumin, and cayenne pepper. Pour in the chicken broth and bring to a boil. Lower the heat, cover and cook until the liquid is absorbed. Stir in the parsley 5 minutes before serving.
Monday, April 14, 2014
Homemade Buns
Homemade Buns

So a few years ago I started making all of the bread that we eat homemade. It tastes so much better and it also allows me to know what is going into the things that we are eating. I mean half the stuff that is in prepackaged premade food we can't even pronounce.
I know most of you don't have time to be making all of your own bread but if you find you have extra time to spare I ask, no beg and plead, you to make homemade buns!!! These taste so much better than store bought. We love to toast them before we use them. We have used them for hamburgers, pulled pork sandwiches, sandwiches and all the various types of sloppy joes we enjoy!!! We have also used them for breakfast. We put eggs and sausage or ham and had a breakfast sandwich. So good!!! They really are simple and easy to make.
Homemade Buns
(makes 12 rolls)
1 1/2 cups warm water
1 T. yeast
2 T. sugar
2 T. oil
1 tsp salt
3 1/2 cups to 4 1/2 cups flour
(I use half whole wheat half all purpose flour)
In the bowl of your stand mixer, combine the water, sugar and yeast and let stand 5-10 minutes or until the yeast is foamy and bubbly. Add the oil, salt and 2 cups of the flour and mix. Gradually add the rest of the flour a 1/2 a cup at a time until the dough pulls off the sides of the bowl. Knead the dough in the stand mixer for 5-10 minutes or by hand 10-15 minutes until is forms a smooth elastic dough. Greased another bowl with cooking spray or a little bit of oil. Place the dough in the bowl, cover with a towel or plastic wrap and let rise until doubled. It will take about an hour. Punch down the dough and cut into twelve equal portions. I use a kitchen scale and make each bun about 2 oz each of dough. I highly recommend a kitchen scale. I just have a cheap one and it works so well. It is nice to have all even looking buns but if you don't want to weigh each bun just eyeball them. I then roll each of the 12 pieces of dough into a ball, place 6 on one large cookie sheet and 6 on another. I then squish each round dough ball down with the palm of my hand. Until it looks like the shape of a hamburger bun. You don't want to squish it too thin but you don't want it too round or it will just look like a dinner roll when finished cooking. Then cover the squished buns with a towel and let raise until doubled in size, it takes about 45 minutes. Bake in a 350 degree oven until golden brown on the tops and bottoms. Take out and butter the tops of each one. Enjoy warm or cold. You can also make these into hot dog buns by rolling the dough pieces into a snake like shape and letting them raise and bake them as directed for the hamburger buns.
Thursday, April 3, 2014
Spicy Sweet n' Sour Meatballs
We love meatballs in this house, in fact, we never met a meatball that we didn't like. With that being said I went on a hunt for a good sweet n sour meatball recipe. I got the sweet n sour recipe from Mel's kitchen Café and new that it would be great because she never disappoints. But then we love spicy things a little bit more than overly sweet and so I decided to combine the recipe I found over on Mel's Blog with a spicy sticky sauce we love to put over chicken. The combination was so great!! Seriously yummy and easy to make!!!

Spicy Sweet n' Sour Meatballs
meatballs:
3 lbs ground beef
1 1/2 cups bread crumbs
3 eggs
1 cup finely chopped onion
2 T. minced garlic
1 cup milk
3 tsp salt
1 1/2 tsp pepper
2 tsp worcesteshire sauce
Sweet Sauce:
2 1/2 cups brown sugar
1 1/4 cup apple cider vinegar
5 tsp mustard
1 1/4 cup bbq sauce
5 tsp Worcestershire sauce
Spicy Sauce:
1 1/8 cup Franks hot Sauce(do not use and other kind)
2/3 cup water
4 cups brown sugar
For the MEatballs: Combine all of the ingredients and mix well. Form into balls and place on a large cookie sheet. Bake at 400 degrees for 15-20 minutes, or until cooked through and well browned all around. If you don't like them as brown cook them less.
For the sauces: In two saucepans, bring the ingredients for each one to a boil and simmer for about 5 minutes. Place the cooked meatballs in a large skillet, pour both sauces over the meatballs and bring the mixture to a simmer. Let simmer for 20 -30 minutes. If the sauce is to thin thicken it with a little cornstarch and water. Serve over your choice of Rice.
Note: I know this is a lot of sugar. If you want to cut the sugar down go ahead and try it. I have never done so, so I can't vouch for it success but let me know if you do and if it works. We always have a little bit of meatballs/sauce over a large portion of rice so we don't feel guilty about the sugar content. This really makes a large pan full and could feed 10 -12 people easily. If you don't want as much cut all the ingredients in half and make a half batch.
Thursday, March 20, 2014
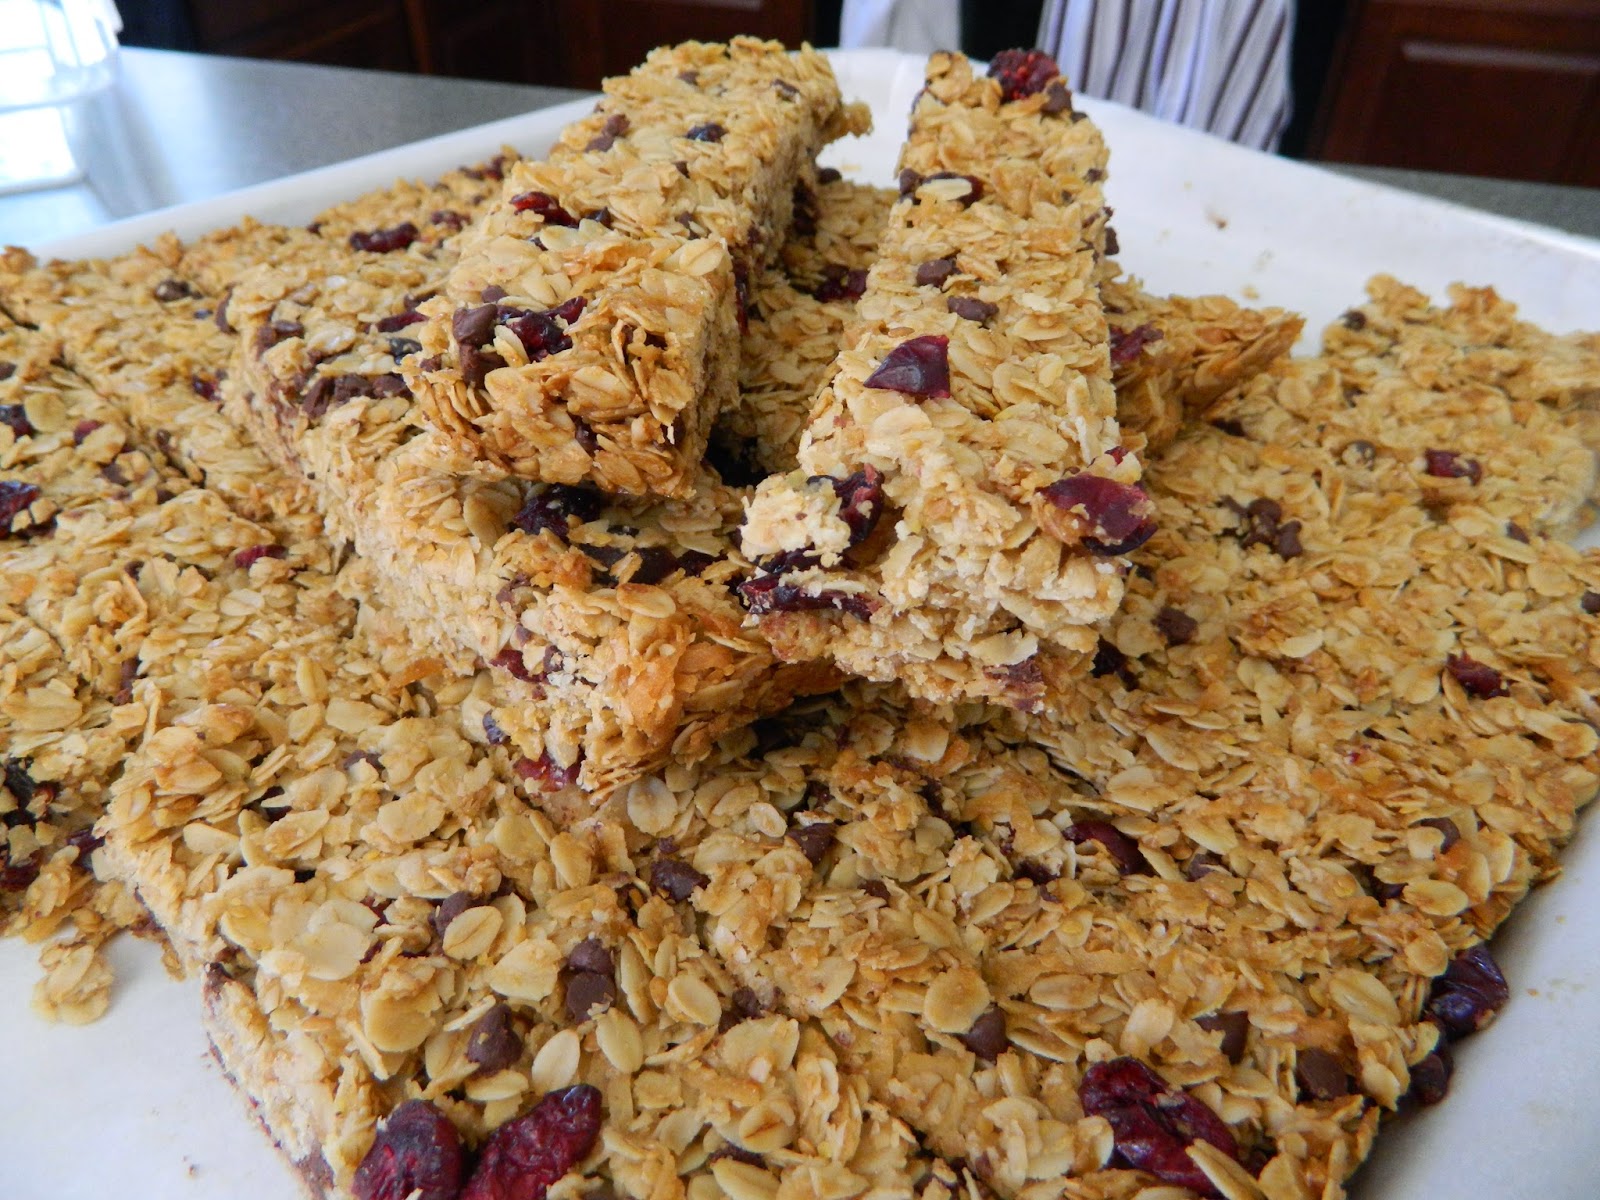
Chocolate Chip Coconut Craisin Granola Bars
I have been meaning to try homemade granola bars for a while now and finally did after printing off tons of recipes for them in the past year. These granola bars were so tasty. Way better than a store bought one and so much better for you-since you get to control the ingredients that go into them not all of the foreign stuff none of us can even pronounce. If you have been skeptical about trying your own granola bars please don't be they are so yummy and the possibilities are endless. The only difference is they don't quite hold together as good as a store bought one but in my book that isn't a big deal because it means no gooey high fructose corn syrup holding them together only real ingredients that are good for us. The original recipe called for dried blueberries but they are really expensive so I just used craisins and added mini chocolate chips to them. Use what you like as mix ins. Make them your own!!!
Chocolate Chip Coconut Craisin Granola Bars
8 cups old fashioned oats
1/4 cup whole wheat flour
1 cup milled flax seeds
1 1/2 cup coconut
2/3 cup brown sugar
1 tsp salt
3/4 cup craisins, raisins, or dried blueberries
1 cup mini semi sweet or dark chocolate chips
1 1/2 cup coconut oil, melted
1/2 cup honey
1/2 cup agave
1 T. coconut extract
1 tsp vanilla
Preheat the oven to 325. Spray or line a large cookie sheet with parchment paper and set aside. Combine the oats, flour, milled flax, coconut, brown sugar, salt, craisins, and chocolate chips in a large bowl. Stir well. In a separate bowl, whisk together the coconut oil, honey, agave, coconut extract and vanilla, stir well. Pour over the wet ingredients and mix well. Press the granola mixture into the prepared pan. Bake for 40 minutes or until the granola bars are golden brown. Allow to cool then cut into bars. Wrap them individually in saran wrap or store covered in a air tight container.
Note: if you don't want a large cookie sheet of them then cut the recipe in 1/2 and press into a 9x13 inch pan.
Note: These are also yummy crumbled up and mixed with some greek yogurt!!!
Wednesday, March 12, 2014
Sugar cookie Bars
Who doesn't love a sugar cookie and, a soft sugar cookie at that, but hates to roll out, cut, bake and frost a ton of cookies? That would be me. That is why they don't make an appearance around our house but once, maybe twice a year. Recipes for these sugar cookie bars are all over the internet and so I decided to try them. Boy were they tasty. They taste just like my soft sugar cookie recipe I have on this blog, which makes all of us in this house happy because we love a soft sugar cookie. Give these a try, PLEASE!!! You will thank me later.

Sugar Cookie Bars
5 cups all-purpose flour
1 teaspoon baking powder
3/4 teaspoon salt
1 cup butter, softened
2 cups granulated sugar
2 large eggs
3 heaping Tablespoon sour cream
2 teaspoon vanilla extract
In a large bowl or bowl of your mixer, Cream the butter and sugar together until light and fluffy. Add the eggs and vanilla and mix well. Add the sour cream and mix. Then add the flour, baking powder and salt and mix until well combined. Press the dough into a large(half sheet) greased, or parchment lined, cookie sheet. You may need to grease your finger with cooking spray to press it all in the pan. I did. Bake in a 325 degree oven for 17-20 minutes or until the very edges start to turn a light brown. DO NOT OVERBAKE. IT IS BETTER TO HAVE THEM A LITTLE UNDERCOOKED THAN OVERCOOKED. Mine were barely light brown on the very edge when I pulled them out. All ovens cook differently so watch carefully. Take out and cool completely. Frost with your favorite frosting. Mine is cream cheese but use whatever kind you like.
Cream Cheese Frosting
2(8 oz) cream cheese softened
1 stick butter, softened
4-5 cups powdered sugar
2 tsp vanilla
Cream the cream cheese and butter until well combined. Add the sugar in a cup at a time, mix well. Add the vanilla and food coloring if desired. Frost the cookie bars. You may not use all of the frosting depending on if you like a lot of frosting or not.
Note: if you don't want that big of a pan of them then just cut the recipe in half and bake them in a 9x13 inch pan.
Tuesday, March 4, 2014
Beef with Broccoli
As I have said before we love all forms of Chinese cuisine in this house. I am always on the look out for new yummy recipes to try. I found a recipe for a broccoli side dish that said you could add chicken or shrimp to it and make it the main dish. It looked really yummy. I highly adapted the recipe just because I like to do that and came up with a yummy main course. If you need a new Chinese recipe give this baby a try. So yummy!!!

Beef With Broccoli
1 lb ground beef
1 medium onion, chopped
2 T garlic
9 cup broccoli, cut into bite size pieces
1 T sesame oil
Sauce:
2 cans chicken broth
3/4 cup soy sauce
1/2 cup Thai sweet chili sauce
5 1/2 T. Sesame oil
5 1/2 T. cornstarch
Sriracha Sauce to taste(depending on how spicy you like it)
Brown the beef in a large skillet. Drain the grease well and set the meat aside. Then add the 1 T. sesame oil, broccoli, onion and garlic to the skillet and cook until veggies are crisp tender. In a small bowl whisk all the sauce ingredients together. Pour over the broccoli, add the beef back in and bring the mixture to a boil. Simmer for 10-20 minutes or until the sauce is thickened and the veggies reach your desired tenderness. It you like more of a bite to your broccoli simmer only 10 minutes if you like it soft simmer it longer. Serve over Rice.
This can feed 8-10 people so cut the recipe in half if you don't want that much!!!
If you want an all veggie dish them don't add the beef- just use more
broccoli or add another veggie with it like bell peppers or cauliflower
You can also do this with chicken or shrimp.
Recipe Source: adapted from Mel's Kitchen Cafe
Tuesday, February 18, 2014
Chocolate Chip Oatmeal Cookies
I am one of those who usually hates flat cookies. I love my cookies to have some depth and heigth to them. I love them to be chuck full of chocolate, nuts, etc. as well. When I came across these cookies I was skeptical at first to try them out but man oh man they were awesome. I have to say they are my husband's favorite cookie other than a regular chocolate chip one. So please Don't let these flat cookies fool you like they almost did me. They are awesome. Soft and chewy, so good!!

Chocolate Chip Oatmeal Cookies
1 cup butter, softened
2 cups brown sugar
2 eggs
2 tsp vanilla
1 cup plus 2 T. flour(I often use white whole wheat flour)
3 cups oats(old fashioned or quick)
1 tsp baking soda
1 tsp baking powder
1/2 cup wheat germ(optional)
1 package mini chocolate chips(I prefer mini chips or chopped up chocolate)
Cream the butter and sugar together until light and fluffy. Add the eggs and vanilla and mix well. Add the flour, oats, baking soda, baking powder, wheat germ, and chocolate chip. Mix well. Roll into balls and place on a greased or silpat lined baking sheet. Bake at 325 for 11-13 minutes. Don't over bake. All ovens cook different so adjust accordingly to your oven. Let sit on pan for 5 minutes then remove to cooling rack. Eat with a glass of milk or ice cream. Yum!!!
Thursday, February 6, 2014
Balsamic Pesto Pasta
I am always looking for new pasta recipes. We love pasta in our house and I for one get tired of always having spaghetti and Alfredo so I when I came across this I just knew I needed to try this out. Now the rest of my family are a red or white sauce kind of bunch but they even liked this pasta and gave it the thumbs up to appear again on our table. So yeah for me!!! If you need a new way to make pasta this is simple and so tasty. We served it with salad and the homemade French bread I posted just a couple of days ago!! Yum!!

Balsamic Pesto Pasta
1 cup pesto
1 tsp salt
1 tsp pepper
1 tsp garlic powder
1 tsp onion powder
2 chicken breasts, cut in to bite size pieces
1 lb box penne or rotini
3 cups fresh tomatoes, diced
1/3 cup olive oil
1/3 cup balsamic vinegar
4 T. fresh basil, chopped
salt and pepper to taste
2 cups mozzarella cheese, shredded
Place the first 6 ingredients in a Ziploc bag and marinate all day or at least 2 hours in the fridge. After you marinate the chicken all day. Take out of fridge, dump all contents into a skillet and cook with 1 T. of olive oil until cooked through. Cook pasta according to package directions. Mix together the tomatoes, olive oil, balsamic vinegar, basil, and salt and pepper to taste. Mix the cooked chicken, cooked pasta, and the tomato mixture well. Add 1 cup of the cheese and mix well. Place in a greased 9x13 inch pan. Cover with remaining cheese and Bake at 325 degrees until cheese is melted and mixture is bubbly around the edges. About 20 minutes.
Recipe Source: adapted from Thirty Handmade Days
Tuesday, February 4, 2014
French Bread Numero Dos
I know I already have a French bread recipe on this blog but if you know me at all I like to try a lot of different recipes. I enjoy trying new things and I love love love all bread!!! Kind of a weakness for me next to sweets, of course, but at least when you make bread at home you control what type of ingredients go in it and hey lets face it homemade bread is divine. Those of you out there that are scared of making your own bread just try it. It takes practice but once you get the hang of it, it is so easy and might I add cheap!!!

French Bread
2 1/4 cup warm water
2 T. sugar
1 T.yeast
1 T. salt
2 T. oil
5 1/2-6 cups flour( I used half white half wheat)
In a large bowl or the bowl of your mixer, combine the water, sugar and yeast. If using active dry yeast, let the mixture activate(get bubbly and foamy) for 8-10 minutes. If using instant yeast, proceed with the recipe no need to let the yeast activate. Add the salt, oil and 3 cups of the flour and mix. Add the 2 1/2-3 cups more of flour gradually. The dough should clean off the side of the bowl and not be too sticky but it should still be soft. Knead for 5 minutes with the dough hook or 10 minutes with your hands until you have a soft smooth dough. Leave the dough in the mixer or bowl to rest for 10 minutes. Then stir it down(turn on the mixer for 10 seconds or stir down with a wooden spoon) and then allow it to rest for another 10 minutes. Repeat for a total of 5 times. Then turn the dough onto a lightly floured surface and divide into two equal parts. Roll each part into a 9x13 inch rectangle. Roll the dough up starting at the long edge(like a jelly roll)and pinch the seam to seal. Repeat with the second piece of dough and place them on a large cookie sheet (equal distance apart) lined with parchment or silpat liner(or cooking spray if you don't have either of the other two) Cover the loaves and let raise until doubled in size. Mine took an hour. With a very sharp knife cut 3-4 gashes at an angle in the top of each loaf. Bake at 375 degrees for 25-30 minutes until golden and baked through.
Recipe Source: Mel's Kitchen Cafe
Wednesday, January 8, 2014
Chicken Pot Pie
I don't know about you all but when I think of Chicken Pot Pie I think of those little frozen individual pies that we all ate growing up. They were cheap and all you had to do was take them out of the box and pop them in the oven. I remember loving them as a kid but as a grown up not so much!! Plus they are not very good for you just like most premade prepackaged things. I have been making homemade chicken pot pie for years but have yet to add the recipe to this blog. It has been several years since I have made this yummy comfort food and so last night I decided to make it for dinner. I got the recipe from my Sister's Sister-in-law. I changed it up a little bit for my families liking and it sure is tasty. Feel free to change the veggies to what your family likes and will eat. But do give this a try it is so much better than a premade frozen one believe me.

Chicken Pot Pie
2 T. butter
2T olive oil
2 chicken breast, cubed
Salt and Pepper
2 cups carrots, diced
4 stalks celery, diced
2 large potatoes, diced and cooked(I used leftover baked potatoes from the night before dinner)
1 large onion, chopped
1 T garlic, minced
1 cup peas, or corn or green beans(I use frozen)if you use fresh add them when cooking the carrots, celery and onion
Salt and pepper
6 T butter
6 T. flour
1/2 cup half n half or cream
2 cups or 1 (14 oz) can chicken broth
Salt and Pepper
2 store bought pie crusts or homemade (enough to cover a 9x13 inch pan)
1 egg, beaten
In a large skillet, heat the butter an oil up, then add the chicken and salt and pepper to taste and sauté until cooked through. Then add the carrots, celery, onion, and garlic and cook until veggies are just about soft and tender. Season with plenty of salt and pepper to taste. Add the cooked potatoes and frozen peas, corn or green beans or a combination of them and cook till they are heated through. Remove the chicken veggie mixture from pan. Add the 6 T butter and melt then whisk in the flour and cook for one minute creating a roux. Make sure it is bubbling gently for the one minute. Then whisk in the cream and chicken broth and whisk till smooth and thick like gravy. Add salt and pepper to taste. THen dump the chicken veggie mixture back into the pan with the gravy and mix well. Dump into a 9x13 inch pan and top with a rectangle pie crust to cover the top. Make sure to cut holes in the crust to vent. Brush with beaten egg. Bake at 375 for 40 minutes or until heated through and crust is a golden brown. I have used both store bought and homemade. when I use store bought I use both crusts , put them together and roll out in to a rectangle. If I use homemade I make enough to cover the top of the 9x13 pan. I only put a top crust on because we like more filling than crust in our house. If you like a lot of crust put some on the bottom of pan, then add the filling and place a crust on top.
Wednesday, December 11, 2013
Coconut Curry Stew
Well it has been fairly chilly here the last week or so. Now I know a lot of the U.S. has been below 0 temperatures and what we have here isn't near as cold but for us who are use to 60 degree weather 30 degrees in the morning when we wake up is fairly chilly. So I decided we needed soup for dinner. When I stumbled across this recipe over at In the little red house I knew we had to try it out. We love curry so I knew we would love this. I adapted it quite a bit to our liking and all my family loved it. Pure comfort food in my opinion especially when served with homemade Naan. So tasty. If you love Indian food or curry for that matter please go make this!!!

Coconut Curry Stew
(adapted from in the little red house)
2 T. coconut oil or any oil you have
2 chicken breasts, diced
1 large onion, chopped
2-3 cups carrots, chopped
1 jalapeno, chopped
2 T. garlic, minced
1 T. grated or minced ginger
2 T. curry powder
2 tsp garam masala
4 T red curry paste(can be found almost anywhere)
2 tsp salt
1 tsp pepper
1 (15 oz) can garbanzo beans/chickpeas, drained
1 1/2 cup dry lentils
1(6 oz) can tomato paste
1 can chicken broth
5 cups water
1 can coconut milk(I use full fat not light)
2 potatoes, peeled and diced
chopped cilantro for garnish
Heat oil in a large pot. When hot add the chicken and cook until almost cooked through. Add the onion, carrots, jalapeno, garlic and ginger and cook until veggies begin to be tender. Add the curry powder, garam masala, curry paste, salt, and pepper and cook for 2-4 minutes more. Then add the garbanzo bean, lentils, broth, water, and coconut milk. Bring to a boil, reduce heat and simmer for about 20 minutes or until lentils are almost tender. add the potatoes and cook for 20 minutes more or until the potatoes are tender. Serve with a sprinkle cilantro and naan bread.
Wednesday, November 13, 2013
Baked Pumpkin Oatmeal
My family and I love oatmeal and granola. Ok lets be honest we love anything with oats in it. We are always looking for new varieties of oatmeal and granola to try so when I spied this recipe over at Sweet Luvin in the Kitchen I new I had to give it a try. Let me tell you this stuff is so good. It come together really fast, tastes amazing and you can store the leftovers in the fridge and reheat the next couple of mornings for a fast, hearty, and healthy breakfast that will keep you and your kids full longer than a bowl of sugar cereal will. Now we still eat the sugary cereal in this house but we try to limit our intake of it and I am so happy my kids will eat pretty much anything I put in front of them and love it. If you are in a breakfast rut go give this recipe a try.

Baked Pumpkin Oatmeal
adapted from Sweet Luvin in the Kitchen
1 can coconut milk
2 eggs
1/2 cup oil
(I used coconut oil, melted but canola or vegetable oil will work)
1 cup pumpkin puree
1 T. vanilla
3/4 cup brown sugar
1 tsp salt
1 T. baking powder
2 tsp cinnamon
1 tsp pumpkin pie spice(recipe follows for home made)
1 cup coconut
6 cups oats
Preheat oven to 350. Grease a 9x13 inch pan and set aside. In a bowl combine the coconut milk, egg, oil, pumpkin, vanilla, and brown sugar. Whisk until smooth and well incorporated. Add the rest of the ingredients and stir to coat evenly. Spread into the greased pan and bake 25-30 minutes or until golden brown on top. Serve warm with milk, pumpkin seeds, walnuts, pecans, almonds, craisins, pomegranates, dark chocolate chips, coconut, etc. We served ours with nuts, chocolate, pomegranates, and milk. Next time I am going to add 1/2 cup of milled flax seeds to the mixture before baking.
Pumpkin Pie Spice
3 T cinnamon
2 tsp. ginger
2 tsp nutmeg
1 tsp cloves
1 tsp allspice
Mix all together and store in an air tight container. Way cheaper than buying it at the store.
Friday, October 25, 2013
Pumpkin Cornbread
It is fall the weather is cooler and with that comes soup season. I love a good bowl of soup/stew/chili when the weather is cool and nothing is better than some fresh made bread or cornbread to go along with it. I stumbled across this gem of a recipe over at In the Little Red House and knew I had to give it a try. This stuff was awesome!!! Nothing says fall like pumpkin and cornbread!! It was genius to put them together. If you love Pumpkin and you love cornbread give this recipe a try you will love it I am sure!!!

Pumpkin Cornbread
(adapted from In the little red House)
1 cup whole wheat flour
1 cup cornmeal
4 tsp baking powder
1/2 tsp salt
1 tsp cinnamon,optional(I didn't use it)
1 cup milk
1/2 cup brown sugar
1 egg
1/2 cup coconut oil, melted
1 cup pumpkin puree
Mix the dry ingredients in a bowl. Mix the wet ingredients in another bowl. Dump the wet ingredients into the dry and mix just until combined. Pour into a well greased 8 or 9 inch square pan and Bake at 350 for 20 -25 minutes or until toothpick comes out clean. Serve with your favorite soup. SLather with butter and honey if desired.
Note: Many cornbread recipes tell you to cook it at a high temp like 400-425 but I find that it makes the outside cook too fast and I hate when the sides are overcooked so I cook it at a lower temp for longer time. All ovens vary in temp so just watch it to make sure you don't cook it to long!! if you want a 9x13 pan size than double the recipe. I always double for my family cause we love cornbread!!
Tuesday, October 22, 2013
Baked Pasta with Smoked Sausage
Last night I was searching for something different to make for dinner than our usual fare and went to one of my most trusted websites for awesome recipes, Mel' s Kitchen café. I decided on this pasta and my family and I loved it. Very easy to put together and tasty. My little family of 5 ate 3/4 of a heaping 9x13 inch pan of pasta!! if you need a new pasta dish or even just an easy meal go give this one a try. Would be perfect for a freezer meal, potluck or when you need to take dinner to someone.

Baked Pasta with Smoked Sausage
(adapted from Mel's Kitchen Café)
1 T. olive oil
1 large red onion, chopped
1 large red bell pepper, chopped
2 T. minced garlic
1(14.5 oz)can diced tomatoes
1(28 oz)can crushed tomatoes
1 tsp dried basil
1 tsp dried oregano
1 cup heavy cream
2 tsp salt
1 tsp pepper
1 lb rigatoni, rotini or you pasta of choice
9 oz fresh spinach chopped
12 oz. precooked Hilshire farms smoked sausage. (you can use any brand and turkey or chicken sausage if you wish)found near the hotdogs in all supermarkets, cut into chunks
2-3 cups mozzarella cheese, shredded
1/4 cup parm cheese
Boil the pasta according to package directions. In a large skillet or pot heat the oil over medium heat. Add the onion and red pepper and cook until almost tender. Add the garlic and continue to sauté till veggies are cooked. add the diced and crushed tomatoes, basil, oregano, salt and pepper and bring to a boil. lower heat and simmer for at least 10 minutes, I prefer to do it about a half hour just because the flavors have more time to come together, but do what you have time for. Meanwhile, heat a small skillet over medium heat. add the precooked sausage and cook until they are browned on both sides. Take off heat and set aside. After the sauce as had time to simmer for a little bit add the cream and spinach to the sauce and heat through. Then mix the sauce, sausage, and cooked pasta all together. Add half of the mozzarella cheese and stir well. Dump into a greased 9x13 inch pan. Sprinkle the remaining mozz cheese and the parm cheese over the top. Place in a 400 degree oven and bake for 20-30 minutes until browned and edges are crisp.
Make Ahead method:
Prepare as directed right up to the baking step and then cover with a double layer of foil. Freeze. Bake covered for 1 hour and 30 minutes, uncover bake 30 minutes more. The dish can also be prepared and refrigerated, covered for up to 12 hours before baking. Bake as directed in the recipe, adding and additional 5-10 minutes if needed
Wednesday, October 9, 2013
Thai Green Curry Meatballs
We love curry in this house and so when I saw this recipe over at Mel's kitchen Café I was intrigued and wanted to try it out. My hubby was skeptical about the meatballs saying that meatballs and curry don't go together but I decided to try it anyway and it was a success. The kids and hubby loved these yummy curried meatballs as did I. Next time I make this I am going to do less meatballs and add some cooked diced potatoes to it. just to change it up a little bit.

Thai Green Curry Meatballs
adapted from Mel's Kitchen Café
Meatballs:
3 large eggs
1 1/2 cup old fashioned oats
1/8 cup milk
2 1/2 lbs ground beef(next time I am going to use 1 1/2 lbs ground beef and add 1 lb partially cooked diced potatoes to sauce)
1 T. grated fresh ginger
2 T. thai green curry paste
1 tsp sugar
1 T. chili garlic paste
1 T. Soy Sauce
1 T. Sriracha Sauce
1/2 cup chopped cilantro
1 1/2 tsp salt
1 T. minced garlic
3 green onion, white and green parts chopped
2 T. coconut oil, fry browning the meatballs
Sauce:
4 cans(13.5 oz each)unsweetened coconut milk
1(4 oz) jar Thai green curry paste
Note: this is the sauce doubled. if you like less sauce cut these ingredients in half but we like it with lots of sauce. also the curry paste, chili garlic paste, and Sriracha sauce can be found at most grocery stores. I get mine at Walmart but you can buy them online as well.
In a large bowl, combine the eggs, oats and milk. Let the mixture stand and soak for 5-10 minutes. Add the ground beef and all of the rest of the meatball ingredients, except the oil, that is for frying them in. Mix to combine and distribute all the ingredients throughout the meat. Shape the meat mixture into meatballs in the desired size you like. I made mine fairly small so they were easy for the kiddos to eat. Heat the oil over medium heat in a large skillet or pot. When the oil is hot place, one layer of meatballs in the pan leaving a little room in between each one. Brown the meatballs on all sides, about 4 minutes total. They don't need to be cooked all the way through because they will continue cooking while simmering in the sauce. do this to all the meatballs and take out and place on a plate. Drain the excess grease from the pan. Return the pan to medium heat and stir in the coconut milk and the green curry paste, scraping up any of the browned bits from the bottom of the pan and stirring into the sauce. Place the meatballs in the skillet in the sauce. Pile them all in and if using the potatoes add the partially cooked potatoes as well. Bring to a simmer and simmer the sauce, meatballs and potatoes for 15-30 minutes, stirring occasionally. I like to simmer mine longer so the flavors have more time to meld together. Add salt and pepper to taste and serve over warm rice.
Thursday, September 26, 2013
Cuban Street Tacos
Tacos. Now who doesn't love a good taco? Can I tell you that these tacos are out of this world delicious. Dare I say one of the best tacos to ever cross my lips and I might add that the leftover meat is amazing on quesadilla or a burritos. Seriously, tasty!!! I have to say also that I have made this pork numerous times over the last few years but always seem to forget to take a picture of it before we inhale them, Now this pork taco has a few steps to go through to make it but believe me it is worth the time and effort and I implore you to not skip any of the steps because they all add to the intense flavor of this meat and make it that deliciousness that you want to eat over and over again!!!

Cuban Street Tacos
4-5 lb boneless pork butt or pork loin, cut into 2 inch chunks(I use pork loin)
1 T. kosher salt
1 T. canola oil or veggie oil
1 cup water
1 cup chicken stock
1/2 tsp pepper
1 tsp cumin
1 tsp chili powder
1 tsp oregano
2 bay leaves
2 T. minced garlic
1-2 jalapenos, finely chopped
1 onion, peeled and halved
juice of 1 lime
1 medium orange, halved,juiced,rinds reservered
Garnishes:
corn tortillas
1 small red onion, diced
cilantro, chopped
sour cream
avocados
cheese
limes
pico de gallo
Rub the pork pieces with the salt and Refrigerate for at least one hour or you can do this the night before to speed up the process. Preheat a large skillet over medium high heat, add the oil, then add the pork pieces and sear each piece on all sides, working in batches, if needed. Once browned, remove the pork to the slow cooker. Into the same pot used to sear the pork pour in the water and chicken stock scraping the bottom of the pan with a wooden spoon to get up all the little brown bits from the bottom of the pan. I need to say that I usually use a can of chicken broth and then add a little bit of water to equal 2 cups of liquid because I never usually have a use for 1 cup of broth and I hate wasting it so I just use it all. Then add the pepper, cumin, chili powder, oregano, bay leaves, garlic, jalapenos, onion, lime juice, juice from the orange and the orange rinds and bring the mixture to a simmer. Pour over the pork in the slow cooker and cook on low for 6-8 hours, until the pork is very tender. Remove the bay leaves, orange rinds and onion chunks. Remove the pork and set aside. Pour the liquid into a saucepan and bring the mixture to a boil. Let the mixture boil until it reduces to about 1 cup and is thickened, slightly. Shred the pork and place back in the crock pot and pour the sauce from the saucepan over the meat. Serve in corn tortillas with all your favorite taco toppings!!!! and rice and beans.
Recipe Source: Mel's Kitchen Cafe
Wednesday, September 18, 2013
Cream Cheese Chocolate Chips scones
In all my years of baking I have never made and an honest to goodness scone. I always thought scones were the pieces of bread dough you flatten out and fry in oil and then slather with butter and honey or whatever else your hearts fancies. Now don't get me wrong those kind of scones taste wonderful but I wanted to branch out and try the baked scones. Let me tell you these did not disappoint. In one word they were Delicious!! I seriously could have eaten the whole batch by myself. They are good served as a dessert or for breakfast. They were super easy to make. If you want something new and tasty to add to your breakfast or dessert repertoire then go make these fast!!! Please!! You will thank me later!!!

Cream Cheese Chocolate Chip Scones
2 3/4 cup flour
2 3/4 cup whole wheat flour
1 cup butter (cold and cut into chunks)
2/3 cup brown sugar
2 T. baking powder
1 tsp salt
4 eggs
4 tsp vanilla
1(8oz) package cream cheese, very softened(I microwave mine for a min.)
1 cup cream or 1/2 cup whole milk mixed with 1/2 cup sour cream
2 cups milk or semi sweet chocolate chips
Glaze:
1 package cream cheese(8oz), softened
2-3 cups powdered sugar
4 T. milk
In a large bowl mix the flours, baking powder, salt, and sugar. Cut in the butter until resembles crumbs. Stir in the chocolate chips. In a separate mixing bowl, mix the eggs, vanilla, milk, cream cheese, and cream. Mix with dry ingredients. Don't over mix or they will be tough. Scrape dough onto a floured surface. Pat into a 17x3 inch rectangle about 1 inch thick. The dough will be fairly sticky so make sure you have enough flour on your work surface. cut into triangles. Place on greased cookie sheet. Bake at 350 degrees for about 18 minutes. Mix the glaze ingredients well and drizzle over the warm but not hot scones. You can let set till cool or you can devour them right away. They are good cold but I prefer them warm out of the oven!!

Monday, September 9, 2013
Homemade Ranch Dressing
My kids and hubby love ranch dressing and there is nothing like homemade ranch. I use to just buy the Hidden Valley Ranch dressing packets and make them because they tasted way better than bottled dressing but I noticed they had MSG in them so I went on the hunt for a homemade mix I could mix myself and make excellent ranch. I was successful and found on pinterest. This ranch is so good and you control the ingredients which I love even better.

Ranch Dressing/ Mix

Parsley Flakes 1 1/2 C
Garlic Salt ½ C
Kosher Salt 2 T
Granulated Garlic ¼ C
Granulated Onion 3/4 C
Dill Weed 2 T (don't leave out adds to the flavor trust me)
1. Combine all ingredients, store in an airtight container. Makes about 3 ½ cups of dry mix
2. To Make Dressing, whisk together 2 T of mix with 2 Cups each of mayonnaise and buttermilk 1 ½ Cups sour cream,. Refrigerate for 2 hours. Makes 1 ¾ Quarts
Please when you make it do not and I mean DO NOT SUBSTITUTE Miracle whip for the mayo. I know their are those of you that like it better and like that it has less fat than Mayo but the taste will not be the same. All ranch dressings are made with mayo not miracle whip. Make sure you refrigerate it for the full 2 hours or more because it gives the flavors time to come together.

Tuesday, September 3, 2013
Tostadas
It has been 2 long moths since I have updated this blog and it is about time it has a few new recipes added to it. I have been MIA because we moved across the country and it has taken this long to get into our new home and settled. I have missed blogging especially food blogging and look forward to doing it again on a regular basis. Anyway, tostadas are so quick and easy and taste wonderful. What can I say anything Mexican is amazing. These are very simple you just need to remember to put beans in the crockpot in the morning or you can even use a can of refried beans and then add all the toppings your heart desires.

Tostadas
Refried beans(recipe found here)
pico de gallo(tomatoes. onion. jalapenos chopped and mixed together)
cheese
avocados
lettuce
Salsa
Limes
Fried corn tortilla(fry a tortilla in oil until crispy and golden brown)
Take a fried corn tortilla and top it with beans, cheese, salsa, pico de gallo, lettuce, lime, and sour cream. Just whatever you desire and you pick it up and eat it with your hands or you can eat it with a fork. You may also eat Spanish rice with them as shown in the picture. My recipe for the rice is found with the link I put up for the beans!! Enjoy!!
Subscribe to:
Posts (Atom)